

FFXIV Dancing Mad Ultimate Boost

'%3e%3cpath%20fill='%23907ACC'%20fill-rule='evenodd'%20d='M6.541%201.786c-.827%200-1.619.324-2.201.9a3.044%203.044%200%200%200-.909%202.166v3.79c0%20.251-.143.468-.351.574a1.102%201.102%200%200%201-.787.327h-.825a1.56%201.56%200%200%201-.995-.35A1.275%201.275%200%200%201%200%208.214V7.186c0-.395.19-.743.473-.98.281-.233.64-.349.995-.349h.677V4.852a4.33%204.33%200%200%201%201.29-3.08A4.42%204.42%200%200%201%206.54.5a4.42%204.42%200%200%201%203.107%201.272%204.33%204.33%200%200%201%201.29%203.08v1.005h.594c.355%200%20.714.116.995.35.284.236.473.584.473.979v1.028c0%20.395-.19.743-.473.98-.281.233-.64.349-.995.349h-.19c-.039.368-.24.916-.674%201.393-.441.486-1.11.888-2.065.998a1.21%201.21%200%200%201-.248.268%201.407%201.407%200%200%201-.875.298h-.805c-.307%200-.624-.097-.876-.298a1.13%201.13%200%200%201-.437-.88c0-.365.182-.677.437-.881.252-.202.569-.298.876-.298h.805c.307%200%20.624.096.875.298.074.059.142.127.201.203.594-.09.947-.339%201.159-.572.14-.154.23-.314.285-.449a.96.96%200%200%200%20.063-.209V9.34a1.038%201.038%200%200%201-.287-.316.64.64%200%200%201-.125-.381V4.852c0-.811-.326-1.59-.908-2.166a3.132%203.132%200%200%200-2.202-.9ZM1.468%207.143a.277.277%200%200%200-.171.052.102.102%200%200%200-.01.01v.99a.102.102%200%200%200%20.01.01c.028.024.089.052.171.052h.594V7.143h-.594Zm9.47%200v1.114h.594a.277.277%200%200%200%20.171-.052.107.107%200%200%200%20.01-.01v-.99a.108.108%200%200%200-.01-.01.277.277%200%200%200-.171-.052h-.594Z'%20clip-rule='evenodd'/%3e%3c/g%3e%3cdefs%3e%3cclipPath%20id='a'%3e%3cpath%20fill='%23fff'%20d='M0%20.5h13v13H0z'/%3e%3c/clipPath%3e%3c/defs%3e%3c/svg%3e)
'%3e%3cpath%20fill='%23907ACC'%20fill-rule='evenodd'%20d='M6.199.557a.831.831%200%200%201%20.602%200l4.689%201.827c.308.12.51.41.51.734v4.567c0%202.518-2.147%204.8-5.25%205.777a.831.831%200%200%201-.5%200C3.17%2012.492%201%2010.45%201%207.685V3.118c0-.324.202-.614.51-.734L6.2.557ZM2.623%203.653v4.032c0%201.747%201.316%203.314%203.876%204.19%202.54-.882%203.878-2.647%203.878-4.19V3.653L6.5%202.142l-3.877%201.51Z'%20clip-rule='evenodd'/%3e%3c/g%3e%3cdefs%3e%3cclipPath%20id='a'%3e%3cpath%20fill='%23fff'%20d='M0%20.5h13v13H0z'/%3e%3c/clipPath%3e%3c/defs%3e%3c/svg%3e)
Rewards
- ⚔️ Dancing Mad (Ultimate) cleared
- 👑 Cruel Legend title unlocked
- 💎 Mad Harlequin's Totem obtained
- ✨ Palazzo Diamond Weapon for your chosen job
- 🎖️ Son of a... achievement completed
- 🎨 Dancing Mad Adventure Plate Kit unlocked
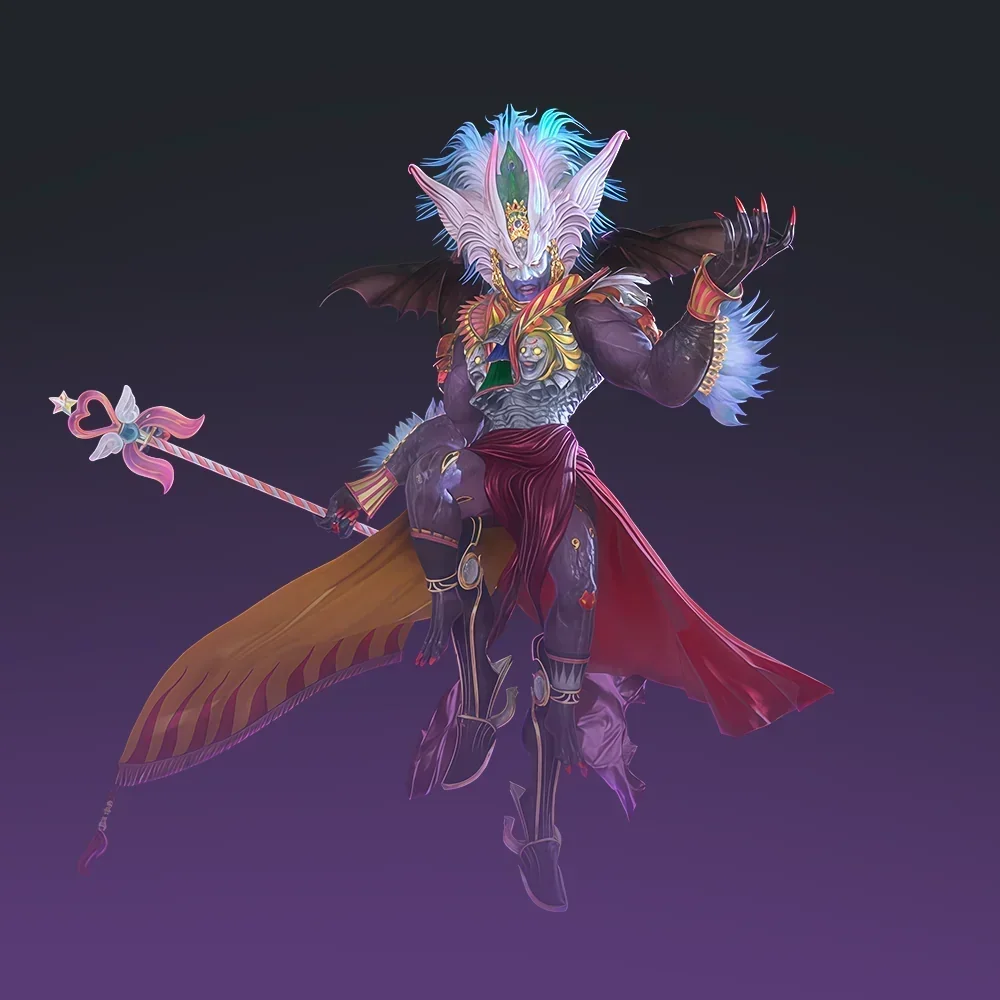
Dancing Mad (Ultimate) is the first Ultimate raid introduced during the Dawntrail expansion, challenging players to relive the final battle against Kefka Palazzo through an entirely new Ultimate encounter. Featuring six demanding phases, numerous body checks, and one of the longest encounters in Final Fantasy XIV, Dancing Mad is designed for the game's most dedicated raiders.
Every successful clear rewards a Mad Harlequin's Totem, which can be exchanged for the exclusive Palazzo Diamond Ultimate Weapon for your chosen job. Alongside the weapon, players earn the prestigious Cruel Legend title and several cosmetic rewards that permanently showcase their Ultimate accomplishment.
Requirements
- Active Final Fantasy XIV account
- 790 ilvl character with access to Ultimate raids
- 100 lvl job prepared for current Ultimate requirements
Other Final Fantasy XIV Services You Might Be Interested In:
Additional Options
- Current Savage Gear Set (iLvl 790): Gear your character with the current Savage equipment before entering Ultimate progression.
- Current Best-in-Slot Gear Set (iLvl 790): Fully optimize your selected job with the recommended Best-in-Slot gear and melds for Dancing Mad.
- White / Green Logs (0–49%): Suitable for players who simply want a recorded clear.
- Blue Logs (50–74%): Aim for solid above-average personal performance while maintaining a safe clear.
- Purple Logs (75–94%): Optimize burst windows, uptime, and rotations for competitive FFLogs rankings.
- Orange Logs (95–98%): Target exceptional performance with highly optimized execution throughout the encounter.
- Pink Logs (99%): Maximum optimization for players pursuing the highest possible FFLogs rankings. Requires ideal party composition and execution.
- AAC Cruiserweight Savage Completion: Complete the current Savage raid tier to prepare your character for Ultimate progression and unlock the latest raid equipment.
- Express Start & Completion: Move your order into the highest priority queue for the earliest available static.
- Extra Gil: Receive additional Gil for crafted gear, consumables, and future progression.
- Live Stream: Receive a private stream link while your order is being completed.
Piloted
Our booster logs into your account and completes Dancing Mad (Ultimate) from start to finish. Ultimate encounters demand exceptional consistency, hundreds of progression pulls, and flawless execution from every member of the static, making Piloted the safest and most reliable way to secure your rewards.
About FFXIV Dancing Mad Ultimate
Dancing Mad (Ultimate) recreates and expands the legendary confrontation with Kefka Palazzo from Final Fantasy VI, transforming it into one of the most mechanically demanding encounters ever released in Final Fantasy XIV.
The encounter consists of six consecutive phases with no checkpoints between them. Every mistake matters. A single death during one of the many body-check mechanics can easily cascade into a full party wipe, forcing the static to restart from the beginning. Because of this, progression is measured not in individual boss kills but in hundreds of coordinated pulls as groups slowly master each phase.
Throughout the fight, players revisit iconic moments from the original Final Fantasy VI finale while dealing with increasingly complex mechanics, strict DPS checks, precise mitigation planning, and demanding execution. Every phase introduces new combinations of mechanics that leave little room for recovery, requiring all eight players to perform consistently for more than twenty minutes.
Unlike Savage raids, Ultimate rewards are primarily prestige-based. Every clear grants one Mad Harlequin's Totem, which can be exchanged for a Palazzo Diamond Weapon matching your chosen job. These weapons feature unique visual effects and remain among the most recognizable Ultimate rewards in the game. Completing the encounter also unlocks the Cruel Legend title, the Son of a... achievement, and the exclusive Dancing Mad Adventure Plate Kit, allowing players to showcase their accomplishment throughout Eorzea.
Although Ultimate encounters do not reward stronger equipment than the current Savage tier, they represent the pinnacle of Final Fantasy XIV PvE. Their value comes from prestige, mastery, and cosmetic rewards rather than item level, making every clear a significant milestone for dedicated raiders.
How This Boost Works
Select your preferred gearing option, FFLogs package, and any additional services before placing your order.
After purchase, one of our boosters contacts you through the website chat to confirm your character details, selected job, and schedule.
Our booster then logs into your account and joins an experienced Ultimate static to begin progression. Depending on your selected options, your character can first be geared through the current Savage tier before the Ultimate clear begins.
Once Dancing Mad has been defeated, your character receives the Mad Harlequin's Totem, unlocking progress toward your Palazzo Diamond Weapon, alongside every other completion reward tied to the encounter.
During the entire process, we provide regular progress updates while our 24/7 support team remains available whenever you need assistance.
Why Choose LevelUpper?
Ultimate raiding demands far more than mechanical skill. It requires consistency, preparation, and a coordinated static capable of executing every phase with precision.
At LevelUpper, every Ultimate order is handled by experienced Final Fantasy XIV raiders who understand progression, optimization, and encounter execution. No bots, no automation, and no shortcuts. Every clear is completed manually using legitimate gameplay.
We maintain fair pricing by working directly with established Ultimate statics and keeping communication open throughout the order. Our boosters provide regular updates, our support team remains available around the clock, and every run is treated with the attention required for one of the game's hardest encounters.
Whether you're chasing your first Ultimate title, collecting Palazzo Diamond weapons, or improving your FFLogs profile, LevelUpper delivers a reliable and professional service.
FAQ
What rewards do I get from Dancing Mad (Ultimate)?
Each clear rewards one Mad Harlequin's Totem, the Cruel Legend title, the Son of a... achievement, and the Dancing Mad Adventure Plate Kit. Totems can be exchanged for Palazzo Diamond Weapons.
How many Totems do I receive per clear?
Each successful completion awards one Mad Harlequin's Totem.
How do I obtain a Palazzo Diamond Weapon?
Trade Mad Harlequin's Totems to the appropriate NPC after completing Dancing Mad (Ultimate). One totem is required per weapon.
Does Ultimate drop better gear than Savage?
No. Ultimate raids focus on prestige rewards rather than higher item level equipment. The weapons have unique appearances but share the current highest item level.
What is the Cruel Legend title?
Cruel Legend is the exclusive title awarded for clearing Dancing Mad (Ultimate).
What are FFLogs options?
FFLogs options determine the level of performance optimization during your clear, ranging from a standard completion to high-percentile ranking runs.
Why is AAC Cruiserweight Savage Completion recommended?
The current Savage tier provides the equipment and preparation expected for Ultimate progression, making the encounter significantly smoother.
Is this service Piloted only?
Yes. Dancing Mad (Ultimate) is offered exclusively as a Piloted service due to the complexity of the encounter and the level of coordination required.
How long does Ultimate progression usually take?
The time varies depending on your selected options and scheduling, but Ultimate progression typically involves hundreds of pulls before a successful clear is achieved.
Can I get multiple Palazzo Diamond Weapons?
Yes. Every clear awards another Mad Harlequin's Totem, allowing you to collect Ultimate weapons for additional jobs over time.