

Destiny 2 Sundered Doctrine Master Boost

'%3e%3cpath%20fill='%23907ACC'%20fill-rule='evenodd'%20d='M6.541%201.786c-.827%200-1.619.324-2.201.9a3.044%203.044%200%200%200-.909%202.166v3.79c0%20.251-.143.468-.351.574a1.102%201.102%200%200%201-.787.327h-.825a1.56%201.56%200%200%201-.995-.35A1.275%201.275%200%200%201%200%208.214V7.186c0-.395.19-.743.473-.98.281-.233.64-.349.995-.349h.677V4.852a4.33%204.33%200%200%201%201.29-3.08A4.42%204.42%200%200%201%206.54.5a4.42%204.42%200%200%201%203.107%201.272%204.33%204.33%200%200%201%201.29%203.08v1.005h.594c.355%200%20.714.116.995.35.284.236.473.584.473.979v1.028c0%20.395-.19.743-.473.98-.281.233-.64.349-.995.349h-.19c-.039.368-.24.916-.674%201.393-.441.486-1.11.888-2.065.998a1.21%201.21%200%200%201-.248.268%201.407%201.407%200%200%201-.875.298h-.805c-.307%200-.624-.097-.876-.298a1.13%201.13%200%200%201-.437-.88c0-.365.182-.677.437-.881.252-.202.569-.298.876-.298h.805c.307%200%20.624.096.875.298.074.059.142.127.201.203.594-.09.947-.339%201.159-.572.14-.154.23-.314.285-.449a.96.96%200%200%200%20.063-.209V9.34a1.038%201.038%200%200%201-.287-.316.64.64%200%200%201-.125-.381V4.852c0-.811-.326-1.59-.908-2.166a3.132%203.132%200%200%200-2.202-.9ZM1.468%207.143a.277.277%200%200%200-.171.052.102.102%200%200%200-.01.01v.99a.102.102%200%200%200%20.01.01c.028.024.089.052.171.052h.594V7.143h-.594Zm9.47%200v1.114h.594a.277.277%200%200%200%20.171-.052.107.107%200%200%200%20.01-.01v-.99a.108.108%200%200%200-.01-.01.277.277%200%200%200-.171-.052h-.594Z'%20clip-rule='evenodd'/%3e%3c/g%3e%3cdefs%3e%3cclipPath%20id='a'%3e%3cpath%20fill='%23fff'%20d='M0%20.5h13v13H0z'/%3e%3c/clipPath%3e%3c/defs%3e%3c/svg%3e)
'%3e%3cpath%20fill='%23907ACC'%20fill-rule='evenodd'%20d='M6.199.557a.831.831%200%200%201%20.602%200l4.689%201.827c.308.12.51.41.51.734v4.567c0%202.518-2.147%204.8-5.25%205.777a.831.831%200%200%201-.5%200C3.17%2012.492%201%2010.45%201%207.685V3.118c0-.324.202-.614.51-.734L6.2.557ZM2.623%203.653v4.032c0%201.747%201.316%203.314%203.876%204.19%202.54-.882%203.878-2.647%203.878-4.19V3.653L6.5%202.142l-3.877%201.51Z'%20clip-rule='evenodd'/%3e%3c/g%3e%3cdefs%3e%3cclipPath%20id='a'%3e%3cpath%20fill='%23fff'%20d='M0%20.5h13v13H0z'/%3e%3c/clipPath%3e%3c/defs%3e%3c/svg%3e)
Rewards
- Chance to obtain Exotic Finality's Auger
- Chance to obtain exclusive dungeon weapons:
- Random Flain Artifice Armor pieces
- Progress for Delver Title
- Future Proof Exotic Sparrow
Episode Heresy introduced one of Destiny 2 unique dungeons, a Sundered Doctrine. LevelUpper boost focuses on completing every encounter, solving beam puzzles, and defeating the final boss Kerrev, The Erased. Learn the precise mechanics behind each phase and earn rewards like Finality's Auger, legendary weapon drops, the exclusive Artifice Armor pieces, and Future Proof exotic sparrow.
Requirements
- The Final Shape Dungeon Key or Annual Pass
Other Destiny 2 Services You Might Be Interested In:


Additional Options
- Priority: Get Sundered Doctrine Master Boost ahead of queues and start fast.
- Stream: Watch your entire Sundered Doctrine Master Boost live on a private stream.
Self-Play
If you prefer not to share your account details, join our professional boosters in-game.
Piloted
Our experienced boosters will log into your account to complete Sundered Doctrine Master Boost. Ensure you provide the correct platform and login details.
About Master Sundered Doctrine
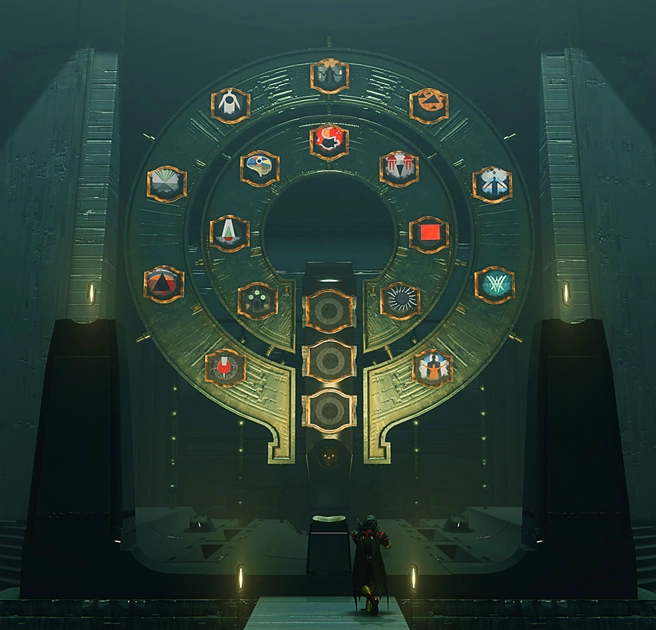
Sundered Doctrine is a dungeon in Episode Heresy, set deep within Rhulk Pyramid Ship on Savathun Throne World. This dungeon is divided into several encounters that test your puzzle-solving and combat skills. The journey starts with Flooded Inspection, where you enter a central chamber equipped with three ready lenses and a symbol wheel featuring one empty slot. Surrounding the chamber are four rooms, two on each side, each with its own symbol wheel. In one of these rooms, a Truthspeaker enemy, marked by a Grim, will spawn and drop the missing symbol. You then shoot a shard above one of the central lenses to produce a light beam and collect additional lenses from Lens Bearer Subjugators found in the rooms. These extra lenses are placed in empty slots and rotated to create a chain linking the central chamber to the correct symbol wheel. This linking process is repeated over several rounds: first linking one symbol, then two, and finally three, which totals six links to complete Flooded Inspection.
A door opens in the central chamber, leading you into a maze. The maze consists of stairs, drops, and corridors that require careful navigation. You start by taking the stairs, dropping through a hole, and following a set route. Turn right at the first junction, then leave down a corridor, cross a bridge, and traverse a long, dark hallway. This section, while straightforward, tests your ability to follow the fixed route and avoid environmental traps like rolling boulders.
Upon exiting the maze, you enter the second encounter, Altered Convolution and Zoetic Lockset. Here, you begin by opening a door and adjusting the symbol wheels. A Perceptor Wizard drops an item called Heightened Knowledge that lets you shift a symbol on the wheel by one space per stack (up to three stacks, known as Overflowing Knowledge). When the correct symbols are highlighted, the door opens to reveal the Zoetic Lockset, a group of four Hive Shriekers accompanied by multiple symbol wheels spread around the room. Each wheel has an effect. For example, one may spawn extra enemy types like Ogres, another might halt enemy spawns temporarily, and one designated as Kill begins the damage phase. The recommended setup is to configure three wheels to Stop and have the final one set to Kill, which provides a longer window for dealing damage while minimizing the extra enemy spawns.
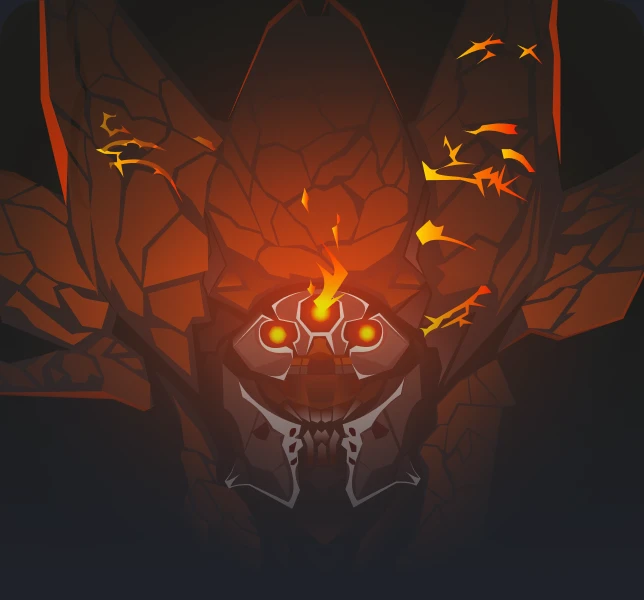
The final phase is the boss fight against Kerrev, The Erased. In a large central room flanked by side chambers, you face a six-symbol wheel split evenly between two sides. The first step is to note all the symbols on the wheel. Then, you search the adjacent side rooms for a Truthspeaker enemy whose dropped symbol tells you which side of the wheel requires adjustment. The mechanic is simple: darken the symbols on the side that match the Truthspeaker's symbol and illuminate those on the opposite side. You accomplish this by interacting with lenses located in smaller rooms. Some lenses are locked with Strand energy and must be cleared using the Unwritten Empowerment buff. Once the correct chain is established, return to the central room and interact with the main symbol wheel. This triggers a burning effect that clears Kerrev's shield, allowing your fireteam a short window for heavy damage using weapons like Linear Fusion Rifles or Machine Guns. You repeat the process until Kerrev is defeated.
Completing every encounter on master difficulty rewards you with the core loot and grants the "Future Proof" exotic sparrow. This special bonus marks your mastery of this dungeon. Additionally, the dungeon rewards include a chance to the exotic Finality's Auger and several legendary weapons: the Unvoiced Shotgun, Unworthy Scout Rifle, Unsworn Trace Rifle, and Unloved Hand Cannon, along with the exclusive Artifice Armor set.
Every phase of the Sundered Doctrine requires both quick thinking and precise execution. Whether you are linking beams in Flooded Inspection, navigating the maze, adjusting symbols in Zoetic Lockset, or coordinating your fire in the final boss fight, each step is designed to push your abilities to the limit. Understanding these mechanics can save you time if you've spent countless hours running through these challenges on your own. Sundered Doctrine Master Boost provides the insights and methods needed to overcome this formidable dungeon, earning rewards that only the most dedicated Guardians can claim.
FAQs
What is the Sundered Doctrine dungeon in Destiny 2?
Sundered Doctrine is a dungeon in Episode Heresy, located inside Rhulk Pyramid Ship on Savathun Throne World. It challenges Guardians with a combination of light beam puzzles, enemy waves, and a unique boss encounter featuring Kerrev, The Erased.
How do the beam puzzles in Flooded Inspection work?
In Flooded Inspection, you start in a central chamber with three lenses and a symbol wheel with one empty slot. You must explore four surrounding rooms to find a Truthspeaker enemy that drops the missing symbol. Then, you shoot a shard to produce a light beam, collect additional lenses from Lens Bearer Subjugators, and place them to create a chain that links the central chamber to the correct symbol wheel. This linking is repeated in rounds until six links are formed.
What is the maze section in Sundered Doctrine, and how is it navigated?
After the first encounter, a door leads to a maze with stairs, drops, and winding corridors. You follow a fixed route: take the stairs, drop through a hole, turn right at the first junction, go left down a corridor, cross a bridge, and finally walk through a dark hallway. This maze prepares you for the next encounter and tests your ability to avoid environmental hazards.
How do the Altered Convolution and Zoetic Lockset encounter function?
This encounter begins with opening a door using Heightened Knowledge from a Perceptor Wizard to adjust symbol wheels. Once the door opens, you face the Zoetic Lockset, where four Hive Shriekers and multiple symbol wheels are present. Each wheel triggers an effect (such as spawning Ogres or halting enemy spawns). The optimal setup is configuring three wheels to "Stop" and the final wheel to "Kill," which maximizes the damage phase window.
Who is Kerrev, The Erased, and what are his mechanics?
Kerrev, The Erased, is the final boss in Sundered Doctrine. In his encounter, you are presented with a six-symbol wheel in a central room. You record the symbols and search the adjacent side rooms for a Truthspeaker that drops a key symbol. You must then darken the symbols on one side of the wheel and illuminate those on the opposite side to clear his shield. Once his shield is down, you have a brief window to deal heavy damage before his shield regenerates. This process is repeated until Kerrev is defeated.
What rewards can be earned from the Sundered Doctrine Master?
Completing the dungeon on master difficulty has chance to rewards you with the exotic Finality's Auger, legendary weapons such as the Unvoiced Shotgun, Unworthy Scout Rifle, Unsworn Trace Rifle, and Unloved Hand Cannon, the exclusive Artifice Armor set, and the prestigious Delver Title. Additionally, if you complete every encounter on Master, you receive the "Future Proof" Exotic Sparrow.
How long does a typical master run of Sundered Doctrine take?
Experienced Guardians who know the layout and puzzle sequences can complete a flawless master run in approximately 30 minutes. Beginners may take longer, especially if extra enemy waves are triggered due to misaligned beams. Practice and good communication with your fireteam can reduce your run time.
Can Sundered Doctrine be completed solo, or is a fireteam required?
The dungeon is designed for a three-player fireteam. The mechanics, especially during the final boss fight, rely on coordinated actions and clear role distribution. Running with a fireteam allows you to split tasks and clear the dungeon more efficiently than attempting it solo.
How do the Sundered Doctrine rewards impact the progression of Episode Heresy?
The rewards from the dungeon are highly valuable. Obtaining Finality's Auger and the suite of legendary weapons improves your loadout for other activities in the season.
What strategies can improve performance in the Sundered Doctrine?
Focus on memorizing the layout of the surrounding rooms and the locations where Truthspeakers drop key symbols. Practice linking beams efficiently by knowing where extra lenses drop, and communicate clearly with your fireteam during the final boss phase. A balanced loadout with fast target acquisition and high damage output is essential for effectively clearing enemy waves and managing damage phases.