


Bow is in a good spot in Monster Hunter Wilds Title Update 4, but most Bow builds have leaned hard into high-risk, high-input setups. Constant repositioning, perfect stamina usage, and basically no room for error. That can be fun, but usually only for a couple of hunts before it starts feeling tiring.
This Comfort DPS Bow build goes the other way. It gives up a bit of theoretical peak damage in exchange for consistency, survivability, and uptime — which in real hunts often means more damage overall. Not because the numbers are higher on paper, but because you’re actually able to keep shooting.
If you like Bow but don’t enjoy playing every hunt on the edge of a stamina meltdown, this setup is meant for you. The idea isn’t to remove stamina management entirely — that’s not realistic — but to stop the build from falling apart the moment something goes wrong.
This setup also pairs well with endgame hunts like Gogmazios, where constant repositioning and stamina pressure make fragile Bow builds fall apart. If you’re preparing for that fight, our Gogmazios guide breaks down the mechanics, phases, and positioning in detail.
About the build
This is a comfort-first Bow build that still hits hard. Not “safe but weak,” and not a speedrun glass cannon either. It’s built for the kinds of hunts where monsters don’t behave nicely, positioning gets awkward, and you’re forced to dodge more than planned. When that happens, the build keeps working instead of punishing you.
The setup is centered around the Gogma Artian Bow, Calamitous Angel, paired with a mixed Gog / utility armor set. Instead of going all-in on affinity stacking, it leans toward raw scaling, passive damage bonuses, and the Gog set’s barrier effect to smooth out mistakes. You’re rewarded for staying active and aggressive without needing perfect execution to keep your damage online.
A big part of why this works is the Gog four-piece bonus. Yes, it boosts elemental damage — but more importantly, it gives you a damage barrier. That barrier absorbs small hits, reduces how often you need to heal, and helps keep Peak Performance active. In practice, it turns Bow from a weapon where one mistake kills your flow into one where you can recover and keep going.
This approach works especially well in endgame hunts like Gogmazios, where constant movement and stamina pressure make fragile Bow builds fall apart. If you’re preparing for that fight, our Gogmazios guide covers mechanics, phases, and positioning in detail.
Before looking at armor and decorations, it helps to understand what the skills are actually doing during a real hunt. This isn’t a setup where you track timers, stare at gauges, or play around perfect conditions. Most of these skills are here because they do their job in the background while you focus on aiming, positioning, and not getting hit.
Burst
Burst works extremely well on Bow because it activates naturally. You’re firing constantly, swapping coatings, dodging, and repositioning — Burst ramps up without you having to think about it. You don’t need to force uptime or line up special windows. If you’re playing Bow normally, it’s already doing its job.
Peak Performance
Peak Performance usually feels annoying on Bow because one small hit shuts it off. The Gog barrier changes that. A lot of chip damage gets absorbed before it touches your HP, so Peak Performance stays active far more often than usual. You don’t have to instantly heal because you clipped a tail or brushed an AoE — you can keep fighting without your damage dropping off.
Adrenaline Rush
Adrenaline Rush fits Bow movement naturally. You’re already dodging to stay in range or adjust angles, and this skill rewards that without asking for perfect timing. No speedrun dodges, no iframe fishing — just normal Bow movement turning into extra damage.
Weakness Exploit
Weakness Exploit is handled simply here. You aim at weak spots, you get crits. One level comes from armor, the rest comes from decorations. The build assumes decent aim, not extreme affinity stacking or gimmicks.
Agitator
Agitator is passive value that shows up when hunts get serious. Monsters are enraged a lot in endgame, and when they are, you get extra raw and affinity without changing how you play. Nothing to manage, nothing to track.
Speed Eating
Speed Eating isn’t here because the build is fragile. It’s here because stopping to heal feels bad on Bow. Faster heals mean less standing around and more shooting. Combined with the Gog barrier, it lets you recover from mistakes without completely breaking your rhythm.
Aquatic / Oilsilt Mobility
This is one of those skills you only notice when it’s gone. In awkward terrain or bad footing, it makes movement feel normal instead of sticky. It doesn’t add damage directly, but it helps you keep pressure instead of fighting the map.
Weapons You Should Use
The build uses a Gogma Artian Bow, so nothing here is automatic. You’re expected to roll for specific bonuses rather than settle for whatever the forge gives you. If you don’t hit the ideal rolls, the build still works — but it loses some efficiency and part of what makes it comfortable.
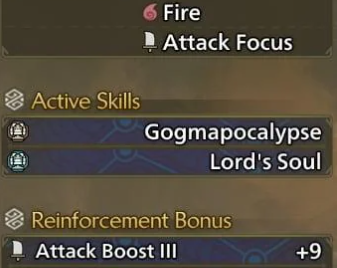
What you want on the bow:
-
Attack Focus – raw scales better here than affinity
-
Gogmapocalypse (weapon skill) – ties directly into Gog armor synergy
-
Lord’s Soul (group skill) – strong passive value
This build deliberately uses four Gog armor pieces, and not just for damage.
Yes, the set bonus boosts element (around 25% with two pieces, around 40% with four), but the real reason to go four pieces is the barrier. It absorbs small hits, reduces healing downtime, keeps Peak Performance active, and makes Bow much less punishing to play.
Armor Setup
Here’s the armor setup, without overexplaining each slot (for Greaves it doesn't matter if it's Alpha or Beta as they're identical):
-
G. Ebony Helm Beta (Transcended) – provides Burst Lv 2
-
Gogmazios Mail Beta – provides Adrenaline Rush Lv 2 and Speed Eating Lv 2
-
G. Rathalos Vambraces Beta (Transcended) – provides Weakness Exploit Lv 1
-
Gogmazios Coil Alpha – provides Burst Lv 2 and Peak Performance Lv 1
-
Gogmazios Greaves Alpha/Beta – provides Peak Performance Lv 2 and Agitator Lv 1
Ebony Helm and G. Rathalos Vambraces are transcended for extra decoration slots. Other Gog pieces can be transcended for defense, but not for skill changes.
This build doesn’t try to turn stamina into a non-issue. You’re still dodging, shooting, and sometimes overextending — because nobody is staring at the stamina bar every second of a hunt. The difference is that when stamina management isn’t perfect, the build doesn’t punish you hard for it. You can dodge a bit too much, lose momentum for a moment, and still keep doing damage instead of feeling like everything fell apart.
Decoration Slots
Once you have the correct armor and a properly rolled bow, decorations are about priorities, not exact copies.
High Priority
-
Weakness Exploit (finish cap)
-
Burst
-
Peak Performance (if missing levels)
Medium Priority
-
Adrenaline Rush
-
Agitator
-
Stamina comfort (player preference)
Low Priority / Flex
-
Evade Extender
-
Speed Eating (if you want Lv 3)
-
Terrain / matchup tech
| Gogma Artian Bow needs specific skills, meaning a lot of grinding. LUBLOG10 saves 10% on gear farming services. |
Exact placement depends on your rolls, but this guide shows what actually matters when assembling the build. Once the build is fully assembled and you have spare resources, it’s worth investing into Transcendence on Gogma pieces for a bit of extra survivability.
Rolling the right Artian bow, farming Gog parts, and finishing this setup can take time — sometimes a lot of it. If you’d rather spend that time playing the build instead of farming for it, many players use LevelUpper's Monster Hunter Wilds Boosting Services to handle monster farming and progression, then jump straight into hunts with a finished setup. Either way, we hope this guide helped — good luck in your hunts.
FAQ
This build works especially well solo because it doesn’t rely on perfect uptime or constant aggression. High stamina efficiency, the Gog barrier, and forgiving damage scaling let you recover from mistakes and keep pressure on the monster without playing perfectly.
It performs very well in multiplayer. The build doesn’t rely on perfect monster control and stays effective even when positioning is chaotic.
The Gog four-piece bonus provides a damage barrier that absorbs chip damage and helps maintain Peak Performance, making Bow gameplay less punishing.
While peak DPS may be slightly lower than glass-cannon builds, comfort Bow setups often deal more real damage over a full hunt because they maintain uptime even during movement-heavy fights.
This build is well suited for casual or relaxed play because it doesn’t punish small mistakes. High Constitution, Stamina Surge, and the Gog barrier allow you to recover quickly and stay effective during longer hunts.