


Gogmazios is not a chaotic fight, and it is not a gimmick hunt. It is a long, mechanically dense Elder Dragon encounter that punishes greed and rewards discipline. Most failed runs are not caused by bad luck or environmental hazards, but by misunderstanding how hard Gogmazios hits and how little margin for error the fight allows.
This guide walks through the entire encounter step by step, focusing on positioning, elemental usage, phase control, and correct use of the arena tools.
Preparation
Gogmazios is an Elder Dragon siege encounter, and it behaves like one. All traps are completely ineffective. Shock Traps and Pitfall Traps do nothing. Gogmazios also cannot be slept, poisoned, paralyzed, or exhausted. It does not tire. If you bring tools or builds centered around those mechanics, they will have zero impact on the hunt.
The only status effects that meaningfully work are Stun and Blast. Blunt weapons can still KO Gogmazios through head damage, and Blast buildup detonates normally, making both viable supplemental sources of pressure. Everything else should be considered irrelevant.
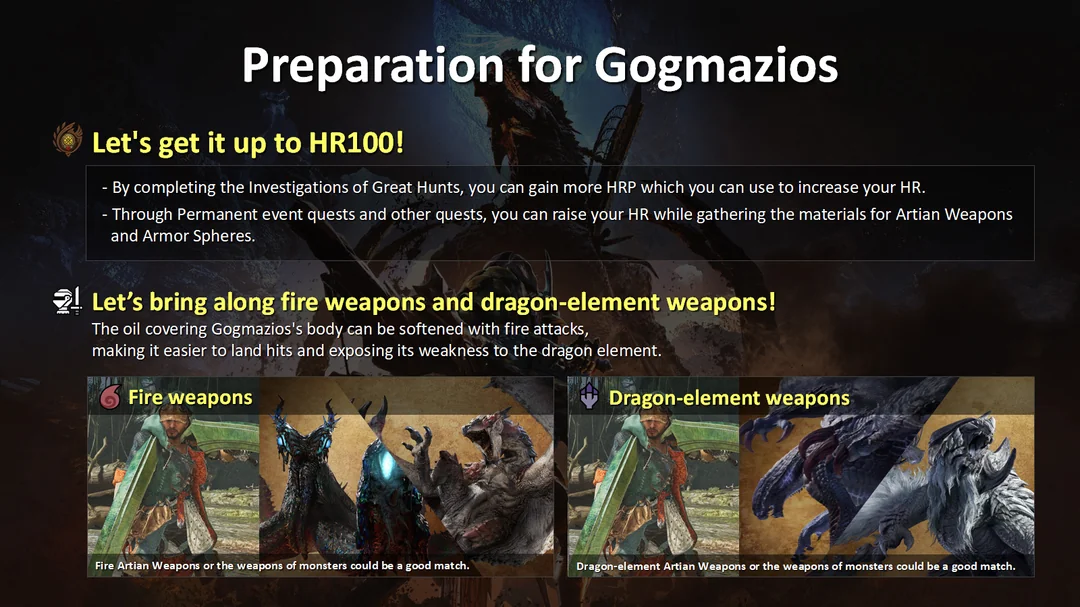
Elemental choice is not about optimizing DPS — it is about avoiding resistance. Gogmazios is resistant to all elements except Fire and Dragon. Using anything else results in heavily reduced damage and a much slower hunt. Fire and Dragon are not recommendations or preferences; they are the only elements that interact properly with the fight.
Fire is used to deal with Gogmazios’ oil coating. When the monster is covered in thick tar, Fire damage melts and removes it. Once the oil is gone, Fire loses value and Dragon becomes mandatory. Dragon is where real damage comes from. After the coating is removed, Dragon damage is required to push phases, suppress empowered states, and control the later portions of the hunt. From Phase Two onward, Dragon should be your default element unless Gogmazios becomes heavily re-coated in tar again. Support Hunters will call out when an element swap is needed.
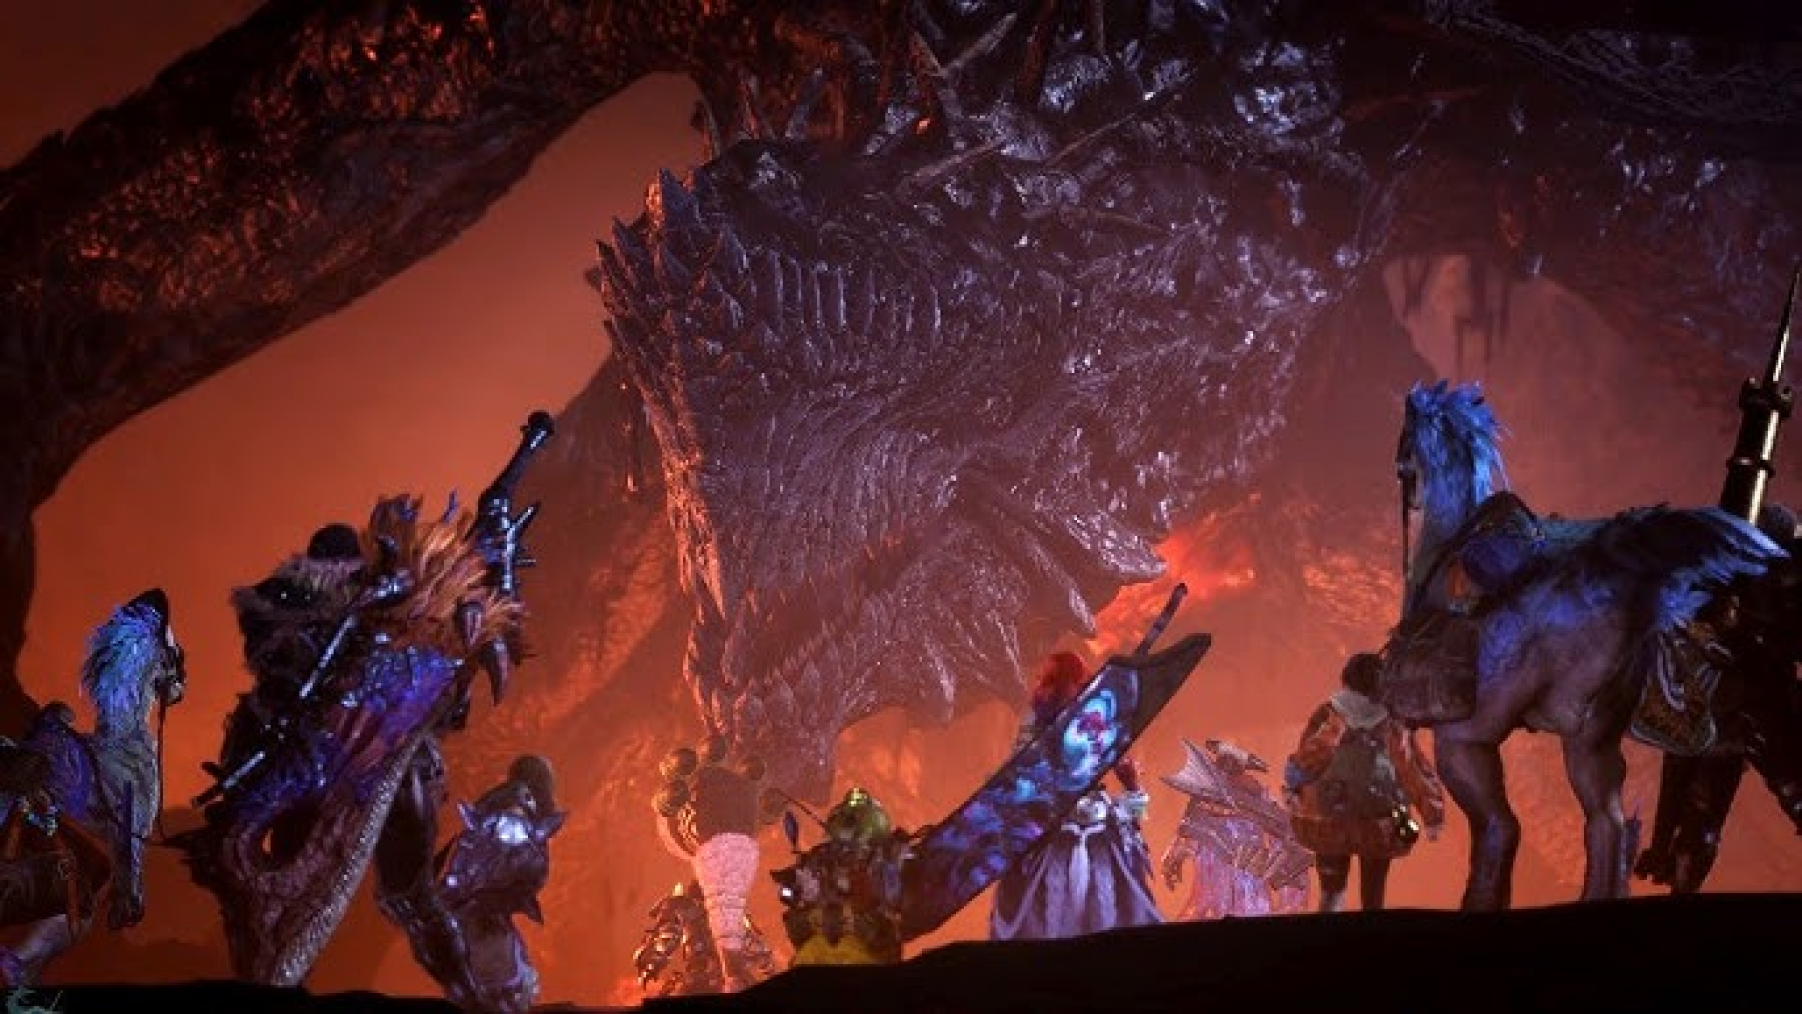
This hunt is built as a siege-style 4+4 encounter. Four Support Hunters are always present by default and participate in the fight regardless of your party setup. On top of that, you can hunt solo, in a duo, or with a full four-player team. In practice, this means every Gogmazios hunt is an eight-versus-one showdown: four NPC Support Hunters plus you and up to three additional player hunters (along with Palicoes where applicable). Whether you run solo with Support Hunters, mix players and NPCs, or bring a full squad, the encounter is designed to feel large-scale and relentless rather than a traditional isolated hunt.
Weapon Requirements
Gogmazios is tuned around fully optimized endgame setups, not “good enough” gear. This is Title Update 4 content, and the game expects you to show up prepared.
Your weapon should be Rarity 8 and among the best options available for your weapon class. This is not a fight where underleveled or placeholder weapons perform well.
For Dragon, viable options depend heavily on weapon type, but in practice most players will be running:
-
Arkveld or Guardian Arkveld weapons
-
Gore Magala weapons
-
Zo Shia weapons
These offer the consistency and scaling needed to maintain Dragon pressure in Phase Two and Phase Three, where Dragon damage becomes mandatory for both damage and control.
For Fire, the most reliable option for most classes is a fully upgraded Rarity 8 Artian weapon. Fire is primarily used in Phase One to deal with Gogmazios’ oil coating, and Artian Fire weapons excel at quickly softening tarred parts so you can transition into Dragon damage efficiently.
Build Optimization
Your build matters just as much as your weapon. Gogmazios will remove most of your HP in one hit on nearly every build, so optimization is about survivability and consistency, not greed.
You should be optimizing:
-
your charm (do not leave this as a filler slot),
-
your decorations to fully cap core survival and damage skills,
-
and your armor pieces, including using Apex γ pieces where appropriate for their survivability bonuses.
If you have access to skills that allow you to survive lethal damage, such as Guts, they are extremely valuable here. Consider including armor pieces that contribute to a strong Group Skill if it fits your playstyle. For example, the Lord’s Soul Group Skill from Apex γ armor (that you can farm from Arch-Tempered Rey Dau, Uth Duna, Nu Udra and the upcoming Jin Dahaad) gives Guts. These skills do not make the fight easy, but they turn potential one-hit knockouts into recoverable situations, which is often the difference between a clean hunt and a cart.
Elemental resistances on your armor are not something you should overthink for this hunt. If you are not running a shield-based weapon or a heavily defensive setup, Gogmazios will still take you down in two clean hits regardless of resistances. What matters far more is raw defense.
Fully upgrading your armor — and using Armor Transcendence where possible — is what turns potential one-hit knockouts into survivable hits. The goal is not to tank Gogmazios, but to ensure that a single mistake does not immediately result in a cart, giving you a chance to heal and recover. Defense does not make the fight safe, but it gives you room to play it correctly.
Phase One
Phase One begins in the lower arena with Gogmazios fully coated in oil. Your first objective is not speed, but control. This is where you learn the elemental rhythm and, more importantly, where you learn where your damage is actually supposed to go.
Use Fire to soften oil-covered body parts. Once the coating melts and becomes visibly fluid, switch to Dragon and punish those softened zones. Applying Dragon damage into fully tarred parts is inefficient and drags the phase out unnecessarily. In practice, Phase One is where Fire sees the most consistent use. Later phases rely far more heavily on Dragon.
| Gogmazios is a 30-minute patience-test if everything goes right. Promo code for 10% off at the bottom for those who'd rather not. |
Tar hazards exist and tar bubbles can explode, but once you learn spacing, they become secondary threats. The real danger is Gogmazios himself. On most builds, two clean hits without healing will result in a cart. His sheer size makes this worse — Gogmazios is enormous, and many of his attacks cover far more space than they appear to. Attacks that look slow can still clip you if you are positioned poorly.
Because of this, random movement is a mistake. Running around Gogmazios chaotically almost always leads to getting hit. Instead, pick a zone and learn it. Hammer users should strongly consider focusing the head early and learning how to dodge bites, downward slams, and mouth lasers. Long Sword users often find better consistency playing around the tail, learning the timing of tail swipes and body turns. Other weapons should follow the same logic: choose a part, learn its threats, and stay disciplined.
This phase also establishes an important rule for the entire hunt: if a part is breakable, it is weak — and that is where your damage should go. Do not spread damage randomly across Gogmazios’ body. Focused part damage creates breaks, knockdowns, wounds, and safer openings while also directly improving your rewards.
Key Breakable Parts and What They Reward
| Part Focus | Material |
|---|---|
| Head break | Gogmazios Fortalice |
| Wing breaks / wounds | Gogmazios Fiberwing |
| Chest break | Gogmazios Lacerator |
| Wingarm breaks | Gogmazios Shredders |
| Tail break / carve | Gogmazios Thorntail |
| Tail and back breaks | Heavy Drakesbone Oil |
| Carves / wounds | Gogmazios Rampart |
| Rare carve / drop | Wartorn Dragongem |
If you are not hitting one of these parts, you are almost always wasting damage. Phase One is forgiving enough to let you learn this, but later phases are not.
Environmental tools should be used early and intelligently. If Gogmazios positions itself beneath rock formations, dropping rocks onto its head provides free damage and a clean opening. Do not force this, but do not ignore it either. These moments are designed damage windows.
As Phase One ends, the lower floor becomes hazardous and turns into lava. At this point, remaining below is no longer viable. You must move to the high ground near Fabius and Nadia, where the next phase is designed to continue. Support Hunters will clearly call this transition out.
Phase Two
Phase Two takes place on the raised platform near Fabius. This section of the fight is much more structured than Phase One and is designed to reward coordination, positioning, and proper use of the available tools.
From this point onward, Dragon should be your default element. Fire only comes back into play briefly if Gogmazios becomes heavily re-coated in tar or if a specific opening calls for rapid softening. Otherwise, Dragon damage should carry the phase and the rest of the hunt. Support Hunters will also call out element swaps if tar buildup becomes relevant again. Wing arms are the primary target during this phase. They are positioned for easy access and dealing enough damage to them triggers topples that expose Gogmazios’ neck, creating safe and extended damage windows. Keep your elemental loop clean: soften briefly if needed, then commit to Dragon.
Several environmental tools are available here and should be used deliberately rather than ignored. Blast-coated chunks along the sides of the platform can be rolled into Gogmazios to deal heavy Fire damage and quickly soften oil-coated parts. These are not meant for random damage — they exist to speed up the Fire-to-Dragon transition so you can return to Dragon pressure as quickly as possible. There is also a mechanical trap on the platform above Gogmazios. When activated via a nearby lever, it slams into Gogmazios’ legs with a heavy mechanical wall, dealing damage and creating another opening. This tool is easy to miss but extremely effective when used during stable positioning.
Now the railgun. The railgun is not a simple interactable — it must be fully charged to be effective. Charging requires connecting three Nexus Wires to the weapon. Each wire reduces charge time. Carrying a wire slows movement, but you can still sprint and dodge, including dodging Gogmazios’ laser attacks if you stay aware. Rushing wire delivery under pressure is one of the most common ways players cart during this phase. Once all three wires are connected, the railgun charges quickly and safely. When fired correctly, it deals massive damage (roughly 60,000+) and forcibly transitions the fight into Phase Three. This is not optional damage — it is the intended phase break.
In multiplayer, coordination makes this phase significantly safer. One or two players should keep Gogmazios pressured and positioned on one side of the platform, while another player handles Nexus Wire delivery and railgun charging on the opposite side. Gogmazios will still fire lasers during this process, so the player carrying wires must remain aware and ready to dodge, but it is entirely manageable with basic positioning.
Phase Three
Phase Three is the longest and most lethal portion of the hunt. This is where most hunts fail, not because of bad luck, but because discipline breaks down and hunters start forcing damage through unsafe patterns.
Environmental control is critical in this phase. There are two large stalactite formations along the edges of the arena that can be dropped onto Gogmazios. These are among the safest and most valuable tools available. Bait Gogmazios underneath them, trigger the collapse, and use the grounded window to regain control of the hunt. If the fight drags on, both should be used.
Gogmazios becomes far more aggressive and spends much more time airborne. Lasers are used constantly, dives come out faster, and oil explosions punish sloppy positioning. Dragon damage is essential here, not just for raw output, but for control. Keeping Dragon pressure on Gogmazios suppresses empowered states and limits access to its most dangerous attack strings. If Phase Three feels overwhelming, it is almost always because one of two things is happening: Gogmazios is staying airborne for too long, or healing is being delayed after heavy hits. Both lead directly to carts if left unchecked.
When Gogmazios is airborne, sustained pressure on the wing arms is key. Dealing consistent damage will eventually break its poise and force it to land. This is one of the most reliable ways to prevent endless aerial pressure and avoid unnecessary carts. Dragon slinger ammo becomes extremely important. Anti-Wyvern slinger ammo can be harvested from softened body parts and must be charged before firing. A fully charged shot deals heavy damage and contributes meaningfully to part breaks. Uncharged shots are inefficient and rarely worth using. Charging on foot leaves you stationary, but charging while mounted on your Seikret allows you to reposition safely before firing.
At certain points in Phase Three, Gogmazios will begin preparing a massive attack. When Fabius calls out, you are expected to get behind him immediately. His shield is designed to fully absorb the blast and is the safest and most consistent way to survive it. Ignoring this call or hesitating will almost always result in a cart.

Healing discipline matters more here than anywhere else in the hunt. Gogmazios can remove most of your HP in a single hit. If you survive an attack, heal immediately. Greeding damage while low is the fastest way to cart at the end of an otherwise clean hunt. Gogmazios will fly often, chain lasers, dive aggressively, and constantly flood the arena with explosive oil. Its size makes these attacks feel overwhelming, but they are consistent. Calm positioning and awareness are what prevent carts.
| Skip the wipes. Code LUBLOG10 for 10% off Gogmazios kills. |
There is one clear exception to playing conservatively. When Fabius calls out to attack with everything you’ve got, you commit. No hesitation. That call signals a true damage window created by the encounter itself. Push damage hard and take everything you are given.
Near the end of the hunt, Proof of a Hero begins to play — the Monster Hunter 4 version. It is the game telling you that the hunt is reaching its conclusion. Stay focused, control your positioning, and finish the fight.
If you’re struggling to reach Gogmazios consistently, stuck behind Hunter Rank requirements, or want help farming endgame materials efficiently, there are optional external services available. LevelUpper provides Monster Hunter Wilds boosting services focused on Hunter Rank progression, endgame hunts, and targeted farming — all done through standard in-game gameplay without exploits.
Loot Table
| Material | Where it comes from |
|---|---|
| Gogmazios Certificate S | Quest rewards |
| Gogmazios Fortalice | Head break |
| Gogmazios Fiberwing | Wing breaks, wounds, rewards |
| Heavy Drakesbone Oil | Tail and back breaks |
| Gogmazios Lacerator | Chest and back breaks |
| Gogmazios Rampart | Carves, wounds, rewards |
| Gogmazios Shredders | Left and right wingarm breaks |
| Gogmazios Thorntail | Tail carve and rewards |
| Wartorn Dragongem | Rare drop/carve |
If you cleared Gogmazios with controlled element swaps, clean Phase Two railgun execution, and disciplined Phase Three survival, you are already doing the fight the way it is meant to be played. From here, the hunt becomes much simpler: keep the Fire-to-Dragon loop consistent, charge and use Anti-Wyvern shots properly, drop stalactites when available, and never fight while low on HP. Don't forget to carve the tail while you're at it, congrats and happy hunting!
FAQ
Gogmazios is a massive Elder Dragon–class monster introduced to Monster Hunter Wilds in Title Update 4. It is a siege-style endgame boss designed as a long, multi-phase encounter that emphasizes positioning, environmental tools, and survival over raw damage racing.
Gogmazios first appeared in Monster Hunter 4 Ultimate. In that game, it was presented as a city-destroying Elder Dragon fought in a large-scale siege battle. Its return in Monster Hunter Wilds keeps that identity, updating the fight with modern mechanics while preserving its role as a true endgame threat.
Because it is designed as the end of Monster Hunter Wilds’ live-service cycle. Title Update 4 is where the game stops easing players in and starts assuming full mastery of its systems.
By this point, the developers expect you to understand build optimization, elemental matchups, positioning, and recovery discipline. Gogmazios is tuned around fully upgraded gear, Armor Transcendence, endgame weapons, and coordinated use of environmental tools. It is not meant to be approachable content for mid-progression hunters.
What comes after Title Update 4 is expected to be either a major expansion or smaller, incremental updates. That makes Gogmazios the final difficulty benchmark for the base game. It is intentionally long, punishing, and mechanically dense, serving as a capstone fight rather than something designed to be farmed casually on first contact.
Fully upgrade your armor, focus on raw defense, bring Fire and Dragon weapons, and do not rely on traps or status effects that Gogmazios is immune to. Treat this as a siege encounter, not a normal hunt, and come in with fully optimized endgame gear.
Gogmazios is only meaningfully affected by Fire and Dragon. All other elements are heavily resisted and should be avoided.
-
Fire is used to deal with Gogmazios’ oil coating. When its body is covered in thick tar, Fire damage melts and removes the coating.
-
Dragon is the primary damage element once the oil is gone. After the coating melts, Dragon damage is required to push phases, suppress empowered states, and control the later parts of the hunt.
The only status effects that have any real impact are Stun and Blast. Any build or item setup focused on other status effects or traps will have zero impact on the hunt and should be avoided. Most status effects do not work at all on Gogmazios. Gogmazios is immune to:
-
Sleep
-
Poison
-
Paralysis
-
Exhaust
-
All traps (Shock Traps and Pitfall Traps)
Yes — and in Monster Hunter terms, this is a very big deal. In the Monster Hunter series, Proof of a Hero is traditionally reserved for final bosses, climactic siege encounters, and end-of-game moments. It does not play during regular hunts. When it appears, it is Capcom’s way of saying: this fight matters.
In Monster Hunter Wilds before Title Update 4, the Wilds arrangement of Proof of a Hero only appeared briefly in scripted story moments and during the end credits. It was never used as a proper combat theme until Gogmazios.
During the later part of the final phase, the Monster Hunter 4 version of Proof of a Hero begins to play as the hunt reaches its climax. This is fully in line with Monster Hunter tradition — Gogmazios originally debuted as a siege-style endgame boss in Monster Hunter 4, the theme played after firing the Demolisher, and its theme returning here is intentional.
Gogma Artian weapons are upgraded versions of existing Rarity 8 Artian weapons.
They are created using Gogmazios materials and gain:
-
A stat focus,
-
A Set Bonus Skill,
-
A Group Skill that can count toward activation requirements.
These bonuses can be rerolled, allowing deep endgame weapon customization instead of crafting new weapons.