


Title Update 4 didn’t overhaul Long Sword in Monster Hunter Wilds, but it did smooth out several long standing friction points. Slot efficiency improved, Armor Transcendence made older pieces easier to justify, and a few set bonus interactions that were previously too restrictive can now be combined without forcing major sacrifices elsewhere in the build.
This guide covers a consistency, comfort focused Long Sword build that leans into those improvements. It’s not a glass cannon burst DPS build, but it’s also not far behind optimized damage setups in practice. Instead of relying on narrow damage windows or perfectly aligned buffs, the build prioritizes sustained uptime, reliable scaling, and forgiving execution. In endgame hunts — especially against monsters that stay enraged for long periods and punish overcommitment — that consistency often matters more than peak numbers.
About the build
In practice, this build doesn’t push you into a specific positioning style at all. What it really does is give you freedom.
If you want to sit on the monster’s tail and farm a cut, you can do that.
If you want to rotate between legs, flank, and head depending on the opening, that works too.
If you want to slow the hunt down, play safe, and let the monster come to you — the build doesn’t punish that choice.
Because survivability and damage are balanced, you’re not constantly pressured to “optimize or fall behind.”
What that looks like in real 9★ / AT hunts:
-
You can commit to tail play without feeling like you’re trolling your DPS
Comfort lets you stay on safer hitzones longer, keep Burst active through normal strings, and still contribute meaningful damage while working toward a tail cut. -
You’re not forced to turn every opening into a Helm Breaker
If the angle is bad or the monster is mid-pattern, you can stay grounded, build Spirit, and keep pressure instead of gambling on an aerial punish. -
Mistakes don’t immediately escalate the hunt
Eating a hit, getting clipped, or disengaging for a heal doesn’t snowball into lost momentum. You reset, re-enter, and your damage plan is still intact. -
Enraged phases feel manageable instead of oppressive
In AT hunts especially, enraged states are long and punishing. This build lets you treat them like a slightly harder 8★ version of the fight, rather than a hard DPS check where one mistake puts you behind permanently.
That last point is really the key takeaway. This build doesn’t make the monster weaker on paper — but in practice, it lowers the execution tax. You’re spending more time actually fighting and less time recovering from errors, overextensions, or dropped buffs. Over the length of a full hunt, that often narrows the gap between this comfort setup and more volatile pure DPS builds. You’re still playing Long Sword. You’re just doing it with more control over the pace of the hunt, instead of letting the hunt control you.
Weapons you should use
This build is made for Title Update 4 endgame, so it assumes you’re using two Gogmazios Artian Long Swords. That’s the baseline for late 9★ quests and AT hunts in TU4, and it’s also what lets the build run its key skill setup without sacrificing armor slots.
If you’re still struggling with Gogmazios, check out our detailed Gogmazios guide on LevelUpper. It breaks down the fight, positioning, and common mistakes that slow most runs down.
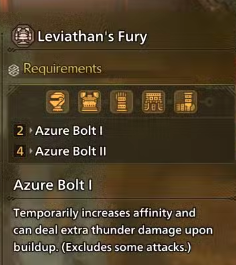
For the skill we're rolling Leviathan's Fury. The reason we’re doing so on a Gogma Artian weapon is simple: we want the Azure Bolt bonus, but we don’t want to commit multiple armor pieces just to get it. In this setup, you’re only using one Lagiacrus piece on the armor side, so the weapon has to supply the missing part of the set bonus requirement. Leviathan’s Fury on the weapon is what completes that requirement and turns Azure Bolt on.
That’s the whole point: Azure Bolt is “cheap affinity.” It’s a free-feeling crit stabilizer that doesn’t force you to change how you play. It procs during the hunt, bumps your affinity for a bit, and helps keep your damage from swinging too hard in long fights — especially in AT hunts where you’re not always glued to perfect weakpoints.
Now the second part of the logic: Artian weapon skills only work while that weapon is drawn. If you swap Long Swords and the other one doesn’t have Leviathan’s Fury, Azure Bolt drops immediately. That’s why you run two Gogma Artian Long Swords and roll Leviathan’s Fury on both — so you can swap freely during long hunts without losing your affinity stabilizer.
Element or status on the swords is not the focus here. Blast, Paralysis, Sleep, Poison, Thunder, Water, Fire, Dragon — all fine. This build isn’t trying to win through element matching; it wins through uptime, keeping Burst online, and staying consistent during enraged phases.
Reinforcement bonuses on your Gogma Artian weapons obviously help (attack, affinity, sharpness), but they’re not what defines the setup. The build works as intended as long as you have two Gogma Artian Long Swords with Leviathan’s Fury so Azure Bolt stays active no matter which sword you’re holding.
It’s also important to be clear about what this build is not. This is not a fully optimized, spreadsheet-perfect min-max setup, and it’s not trying to be one. There are other viable directions you can take depending on your gear and jewel pool.
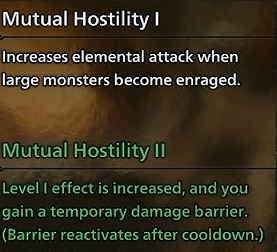
For example, you could lean harder into Gogmazios armor and Gogmapocalypse (Mutual Hostility) to push elemental damage further during enraged phases, at the cost of some comfort and flexibility. This build deliberately stops short of that, choosing stability and uptime over squeezing out every possible point of damage.
Armor setup
This build runs a mixed endgame armor setup, and the split between pieces is intentional. You’re combining Gogmazios α pieces as the damage backbone with Lagiacrus β and Guardian Ebony Odogaron β pieces as support enablers. That distinction matters later when we get to decorations.
Lagiacrus head
You are using a Lagiacrus β head piece. Its only job in this build is to contribute toward Leviathan’s Fury so you can activate Azure Bolt together with the weapon. You’re deliberately stopping at one Lagiacrus piece to avoid committing to the full set or inheriting unnecessary skills.
This is a support pick, not a damage piece. It gives you affinity smoothing without forcing you to shape the entire build around Lagiacrus armor, and being a β piece is important because it gives you the flexibility you’ll need later for decorations.
Gogmazios chest and waist
The Gogmazios chest α and Gogmazios waist α are the core of the build.
These two pieces activate Gogmapocalypse, giving you Mutual Hostility, which increases elemental damage while the monster is enraged. In 9★ quests and AT hunts, this bonus has strong uptime without asking anything special from the player.
These are α pieces on purpose. You’re taking them for:
-
their built-in skills
-
the set bonus
-
the fact that they don’t need to be “fixed” with decorations
They form the damage backbone of the build and stay effective even before you start slotting jewels.
Guardian Ebony Odogaron arms
The arms are Guardian Ebony Odogaron β, and they’re one of the most important support pieces in the setup.
They exist to activate Ebony Odogaron’s Power, which gives Burst Boost. Burst Boost extends Burst duration and adds raw attack while Burst is active, turning Burst into something you can maintain through normal Long Sword play instead of a short proc you constantly lose.
These arms must be transcended. Without Armor Transcendence, the decoration slots are too restrictive and the build doesn’t come together cleanly. Being a β piece is critical here, because this armor is doing support work and relies on jewels to reach its full value.
Duna Wildgreaves γ
The legs are Duna Wildgreaves γ from Arch-Tempered Uth Duna.
They give you Quick Sheathe level 3, which is a staple for Long Sword in late-game content. Faster sheathing means safer heals, faster resets, and less punishment when you disengage during AT patterns.
They also provide Agitator, which naturally fits a build that already gains value during enraged phases through Mutual Hostility. This piece doesn’t need decoration support to justify itself — it just works.
How to put the build together
At this point, the build logic is already set:
-
Gogmazios α pieces are the damage backbone
-
Lagiacrus β and Guardian Ebony Odogaron β act as support
-
Two Gogma Artian Long Swords carry Leviathan’s Fury
All that’s left is slotting decorations correctly so everything lines up the way it’s supposed to in 9★ and AT hunts.
The tables below show the exact jewel placement per piece. You don’t need to improvise or reshuffle skills — if you slot things this way, the build comes together cleanly.
Weapon Decorations
Both Gogmazios Artian Long Swords are decorated the same way to keep things consistent when swapping weapons during long hunts.
| Weapon | Slot 1 | Slot 2 | Slot 3 |
|---|---|---|---|
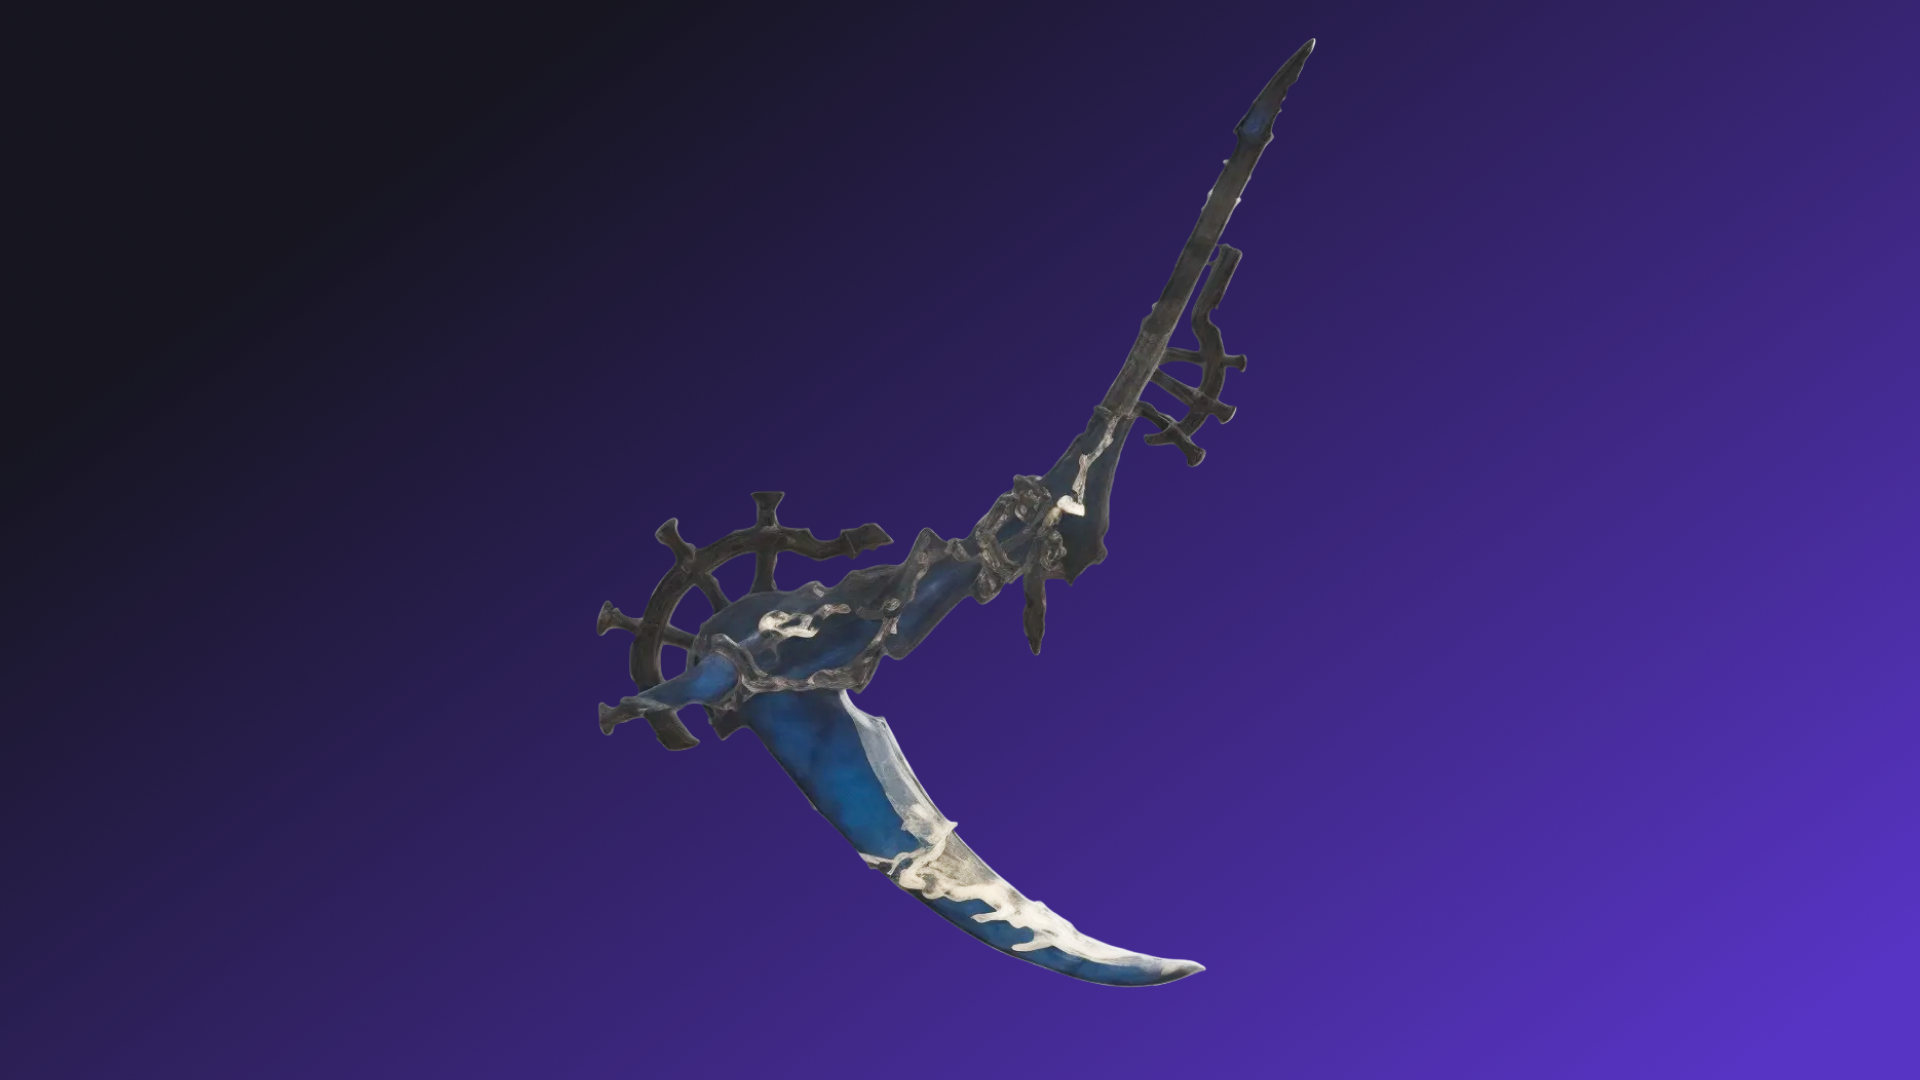
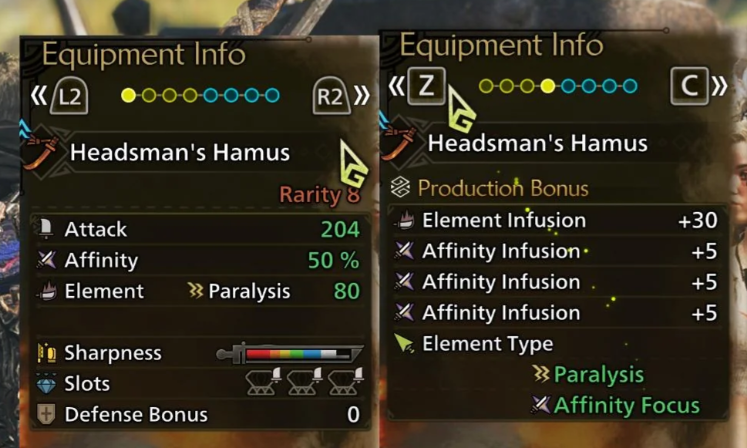
| Headsman's Hamus | Critical Jewel III | Critical Jewel III | Razor Sharp Jewel |
| Headsman's Hamus | Critical Jewel III | Critical Jewel III | Razor Sharp Jewel |
This gives you Critical Boost 3 on both weapons, which is mandatory regardless of build type. Any crit you land needs to hit harder, and there’s no reason to compromise here.
The third slot on each sword is where RNG flexibility comes in:
-
If you have access to mixed jewels (for example, Razor Sharp combined with Blaze or Handicraft), you should absolutely use them. That’s free sharpness comfort plus extra value on top.
-
If you don’t have mixed jewels, just run plain Razor Sharp. The build works perfectly fine without Blaze or Handicraft layered on.
Blaze / Handicraft are bonuses, not requirements. Razor Sharp is the baseline that keeps the build stable in long fights.
Charm Choice
The charm slot is intentionally flexible and depends heavily on what you have access to.
Ideally, you’re using a Secret charm from 9★ monsters with strong core skills such as:
-
Handicraft
-
Agitator
-
Weakness Exploit
These charms give you extra flexibility and let you adjust weapon or armor jewels slightly if needed.
If you don’t have a good random charm yet, there are two guaranteed options that fit the build perfectly:
-
Exploiter Charm for Weakness Exploit
-
Challenger Charm for Agitator
Both work without any RNG and keep the build functioning exactly as intended.
Armor Decorations
Armor decorations are where the build’s core skills are finalized. The armor itself already defines the roles; the jewels are used to push skills that Long Sword keeps active naturally.
| Want the build without the deco grind? Code LUBLOG10 for 10% off. |
| Armor piece | Slot 1 | Slot 2 | Slot 3 |
|---|---|---|---|
| Lagiacrus Helm β | Chain Jewel | Mighty Jewel | — |
| Gogmazios Chest α | Medicine Jewel | Medicine Jewel | Medicine Jewel |
| Guardian Ebony Arms β | Chain Jewel | Counter Jewel | Counter Jewel |
| Gogmazios Waist α | Counter Jewel | Tenderizer Jewel | — |
| Duna Wildgreaves γ | Tenderizer Jewel | Protection Jewel | Protection Jewel |
| Charm | Adapt Jewel | Adapt Jewel | — |
Nothing here is compensating for bad armor skills. Every jewel slot is doing something useful during normal Long Sword play. The skill choices here are straightforward:
-
Burst is pushed because Long Sword maintains it naturally, and Burst Boost is already active from the armor. This turns Burst into a sustained background buff instead of a short proc.
-
Counterstrike adds flat raw attack with extremely high uptime in real hunts, especially in AT content where trades and counters happen constantly.
-
Maximum Might provides reliable affinity because Long Sword doesn’t burn stamina continuously, especially in comfort-oriented play.
-
Weakness Exploit rewards good hitzones without forcing head-only play or perfect positioning.
-
One-slot jewels are used entirely for survivability and uptime, not damage padding.
If all of that is in place, the build plays cleanly: stable damage, smooth flow, and far fewer moments where one mistake snowballs the hunt.
Closing thoughts
What this build really offers is control over the hunt. In late 9★ quests and AT hunts, success is about how often you’re allowed to stay in the fight without being forced out by chip damage, bad RNG, or one mistimed commit. This setup shifts that balance in your favor. You get more room to read patterns, more freedom to choose when to push and when to disengage, and fewer moments where the hunt spirals because one thing went wrong, straight to cart.
That makes it a strong choice not just for clearing content, but for learning fights properly. You can focus on positioning, counter timing, and monster behavior instead of constantly watching buff timers or worrying about whether missing one opening will lead to carting.
If you enjoy Long Sword for its flow and adaptability, this build leans into that identity instead of fighting it. It’s about making difficult hunts feel manageable, repeatable, and honestly more enjoyable. That’s often what keeps people coming back to Monster Hunter in the long run.
This setup assumes access to TU4 endgame gear: Gogmazios Artian weapons, Armor Transcendence, and consistent clears in 9★ and AT hunts. Getting there can take time, especially if you’re juggling failed runs, bad rolls, or limited playtime.
If you’d rather avoid repeating the same hunts just to roll usable gear, LevelUpper offers Monster Hunter Wilds boosting services focused on TU4 endgame progression. That includes Gogmazios farming, Artian weapon preparation, and help unlocking or finishing the gear needed for builds like this.
It’s an option for players who want to spend more time actually hunting with a finished setup instead of grinding toward it.
FAQ
Long Sword is one of the most reliable weapons in Monster Hunter Wilds thanks to its counters, mobility, and sustained damage. It performs especially well in endgame content where positioning and uptime matter more than raw burst.
There isn’t a single best build for everyone in TU4. Most endgame Long Sword builds fall into either high-risk burst setups or comfort-focused builds with better uptime. Mixed armor sets with Gogmazios pieces and Artian weapons are currently the most popular choice for 9★ and AT hunts.
Azure Bolt is a bonus effect activated through Leviathan’s Fury. When active, it provides a temporary affinity increase during the hunt, helping stabilize damage without requiring strict positioning or timing.
Mixed armor sets are generally best for Long Sword in endgame. Combining Gogmazios α pieces for damage with β support pieces like Lagiacrus and Guardian Ebony Odogaron gives better slot efficiency and more flexible builds.
Handicraft is helpful but not mandatory. If you have mixed jewels that include Handicraft, it’s worth using. Otherwise, sharpness skills like Razor Sharp are usually enough for long hunts.
Long Sword is very strong in solo play due to its counters, flexibility, and ability to maintain steady damage without relying on team setups or coordinated openings.