


Seasonal events in ARC Raiders usually don’t pull you out of the core loop, and Flickering Flames sticks to that philosophy. You’re still dropping into Speranza, hitting familiar POIs, dealing with ARC patrols, and racing other players to extraction. The difference is that while the event is active, every decision you make during a raid also feeds into limited-time progression that won’t be around forever.
If you understand what’s contributing to that progression — and when — the event fits neatly into normal play. If you don’t, it’s easy to spend a week running raids and later realize you weren’t moving the needle as much as you thought. During the event window, that usually means making small adjustments to how you run raids. You still choose maps the same way, still bring the same loadouts, and still aim for the same extractions, but certain choices start to matter more. Routes that keep you moving through multiple POIs, quick fights that end decisively, and clean extractions all translate directly into better event progress. Slow, empty runs feel fine in the moment, but they add up poorly over several days.
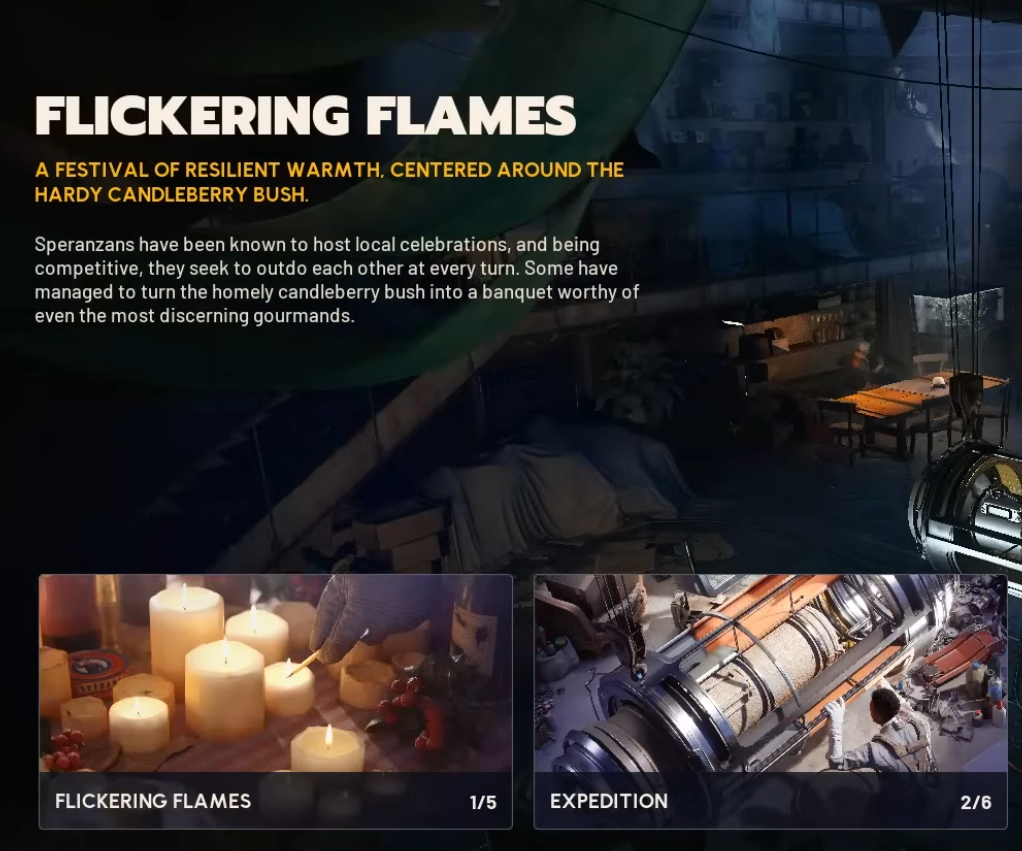
How Flickering Flames Works
Flickering Flames runs on top of standard raids and tracks progress in two ways at once.
The first is a reward track that advances based on raid XP. Any run where you’re looting containers, fighting ARC units like Rollers or Wasps, completing quest steps, and extracting alive will push this forward. High-risk, low-survival runs slow it down.
The second is a community donation project, which asks you to give up specific items — including event-only materials — to unlock shared rewards. These two systems overlap constantly: some reward tiers give you materials for the project, and some project stages give you extra progress toward the reward track.
Nothing here is hidden, but nothing is automatic either. Think of the event as a layer sitting on top of the usual risk-reward loop. Every time you decide to stay longer, push another compound, or rotate through an exposed area, you’re trading safety for progress. Every time you extract early, you lock in XP and move the event forward. Over the full event duration, those small decisions end up mattering more than any single high-intensity raid.
How Flickering Flames Compares to Other ARC Raiders Events
If you’ve played previous ARC Raiders events, Flickering Flames fits into a familiar pattern — each event tweaks the same raids in a specific direction rather than changing the game outright.
-
Night events focus on visibility. It’s darker, sightlines shrink, and sound awareness matters more than aim.
-
Lush Blooms increase plant spawns across maps, turning vegetation routes into the main source of value.
-
Harvester events scatter pre-filled plant baskets around the map, rewarding quick pickups over exploration.
-
Flickering Flames (Cold Snap) adds environmental pressure. The cold drains health, exposed routes become risky, and shelter matters more than raw speed.
-
Electromagnetic storms change the skybox and atmosphere, with thunderclouds and occasional lightning strikes that can hit near players and force movement.
The key difference with Flickering Flames is that the environment actively pressures your timing. You’re still looting the same POIs and fighting the same ARC units, but staying outside too long carries a clear cost. Compared to plant-focused events or visibility-based modifiers, Cold Snap pushes players toward tighter routing, faster decisions, and earlier extractions.
Event Reward Track (Merit)
Merit comes directly from XP earned in raids, which means how you play matters more than how long you stay alive.
A clean run where you loot multiple buildings, pick off a few ARC units, complete a quest interaction, and extract through a hot zone will move the bar far more than ten minutes of hiding followed by an early death.
You’ll notice this especially if you compare runs. A raid where you rotate through two compounds, breach a locked container, deal with a patrol, and leave with a full backpack feels completely different on the reward track than a quick in-and-out where you barely engage with the map.
There are 25 tiers total, and while the early unlocks come fast, the later ones expect steady progress over time.
Merit gain feels best on runs where you touch several systems at once. Looting containers, dealing with patrols, interacting with quest objects, and extracting through active zones all stack together. A raid where you rotate through two named areas, clear one ARC group, and leave with a full pack often advances the track more than a longer raid spent waiting for fights that never happen. Over multiple sessions, this creates a clear difference between active routing and passive survival.
What You Actually Get
The track is built around limited-time cosmetics and event items. You’re unlocking winter outfit pieces, color variants, charms, and emotes — the sort of stuff that signals you were around for the event.
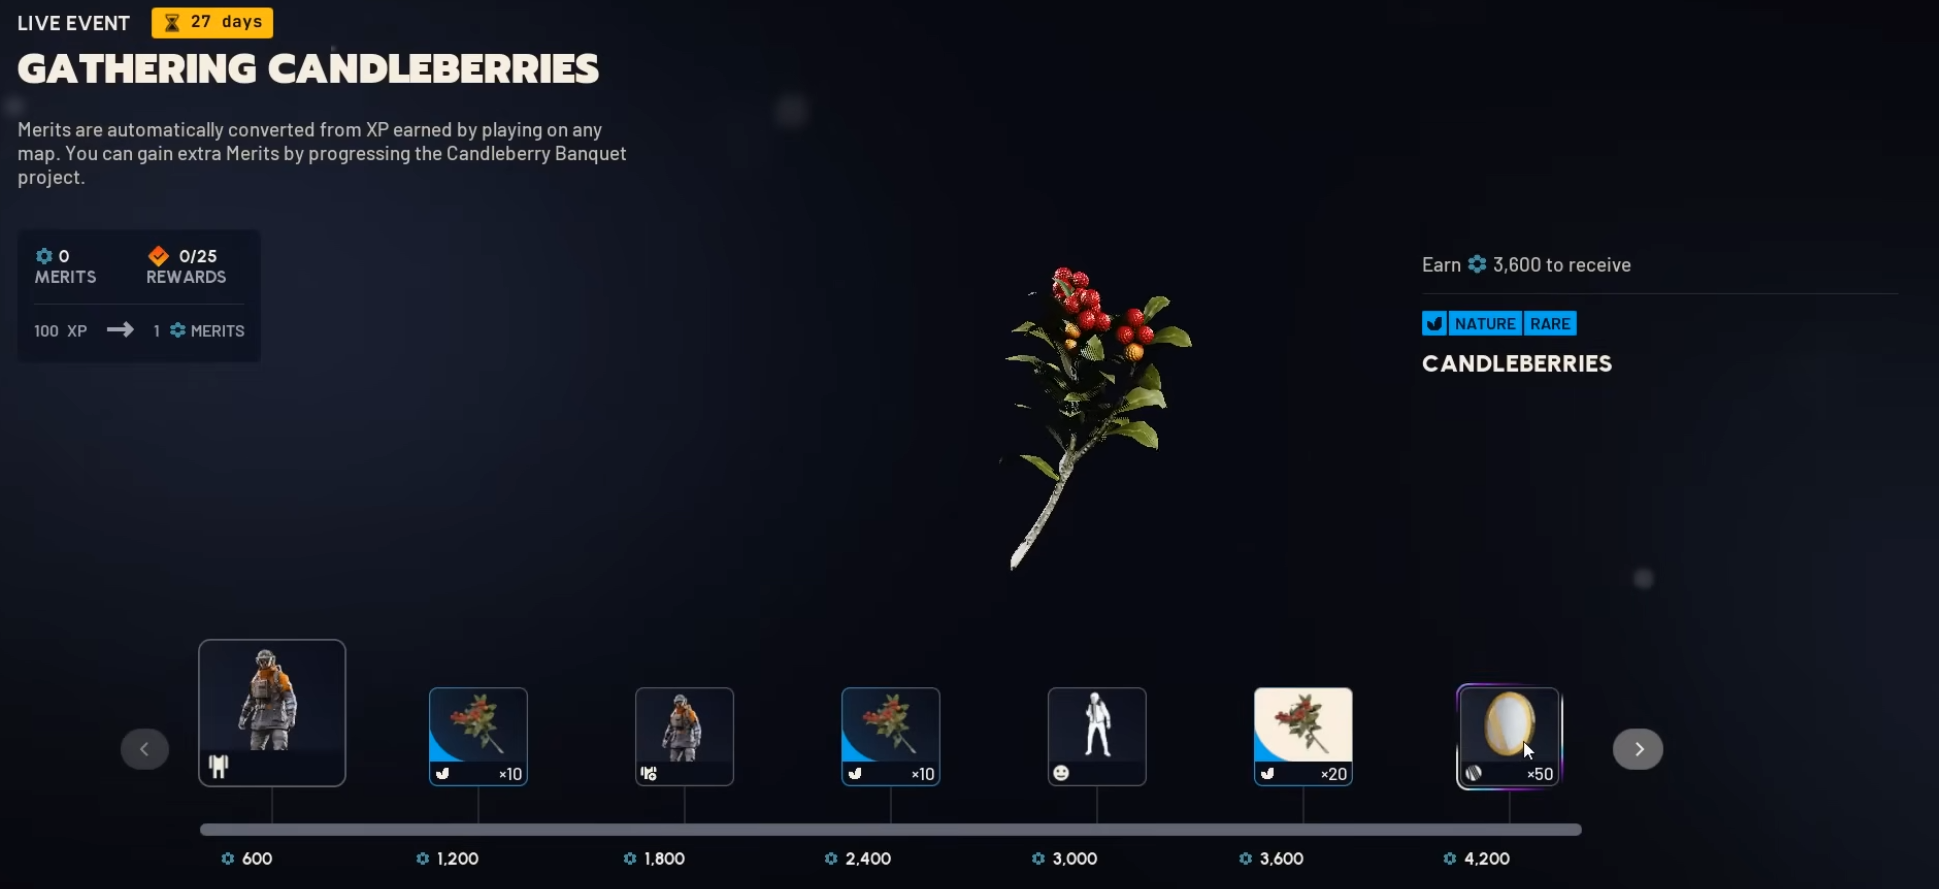
You’ll also pick up Candleberries and event currency along the way, which feeds directly into the donation side.
The final tier gives you a unique tool cosmetic. Miss it, and it’s gone. Because these rewards sit outside normal progression, they act more like a snapshot of when you played than a long-term investment. Players who finish the track usually do it through steady accumulation rather than focused grinding. That makes the reward line feel predictable when approached early and compressed when approached late.
Candleberry Project
The donation project is where players usually hesitate, because donating means giving something up permanently.
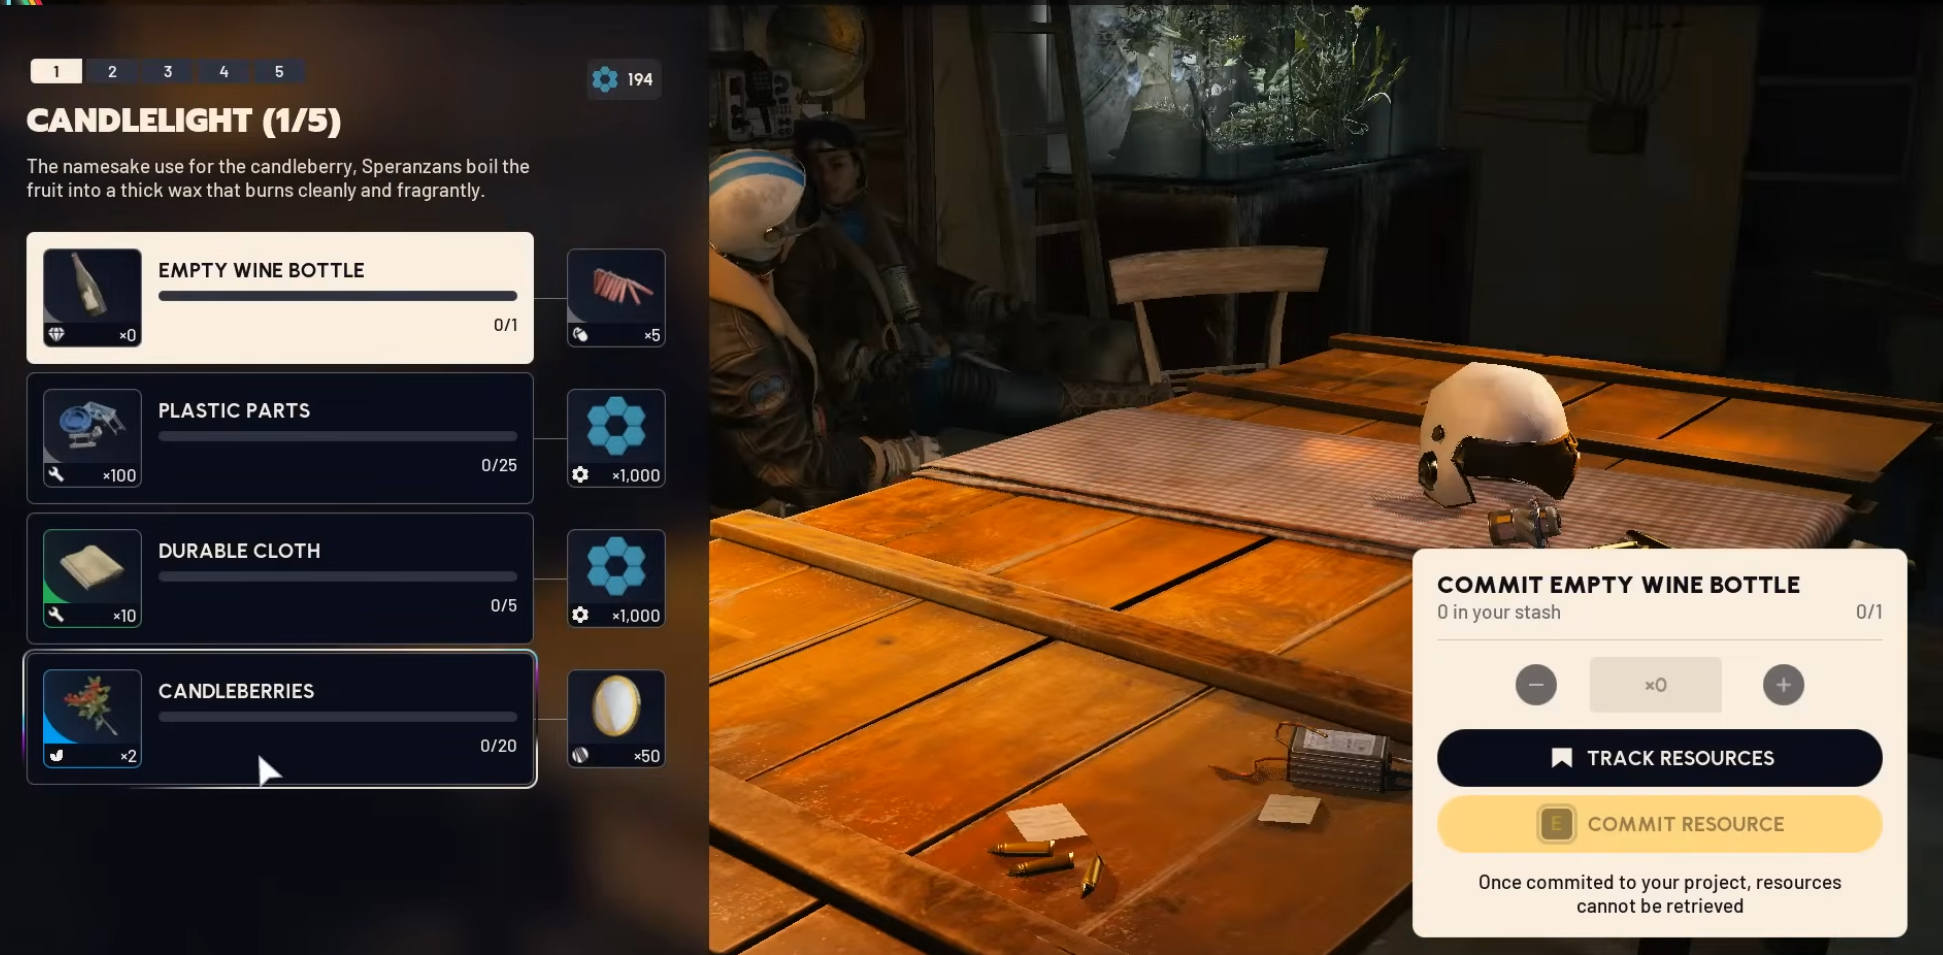
Each of the five stages asks for a mix of items. Candleberries are the headline material, but they’re rarely the only requirement. You’ll also be handing over common crafting resources pulled from residential buildings, industrial zones, containers, and vehicles.
The trap here is waiting too long. Players often hold onto everything “just in case” and then realize in the final days that they need to dump a large amount of resources all at once. Others do the opposite and donate everything early, then struggle to keep their own crafting moving.
The sweet spot is donating steadily as you play. A practical way to handle donations is to treat them like maintenance rather than a goal. When your stash fills with common materials after a few raids, committing part of that surplus keeps the project moving without stalling crafting or upgrades. Over time, this approach keeps both sides of the event advancing together instead of forcing a late decision between personal progress and project completion.
| Reader Discount: Code LUBLOG10 at levelupper.com for 10% off. |
Where Candleberries Come From
Candleberries only spawn on maps that currently have the Cold Snap modifier active, so you must queue into a raid where Cold Snap is listed as the active map condition.
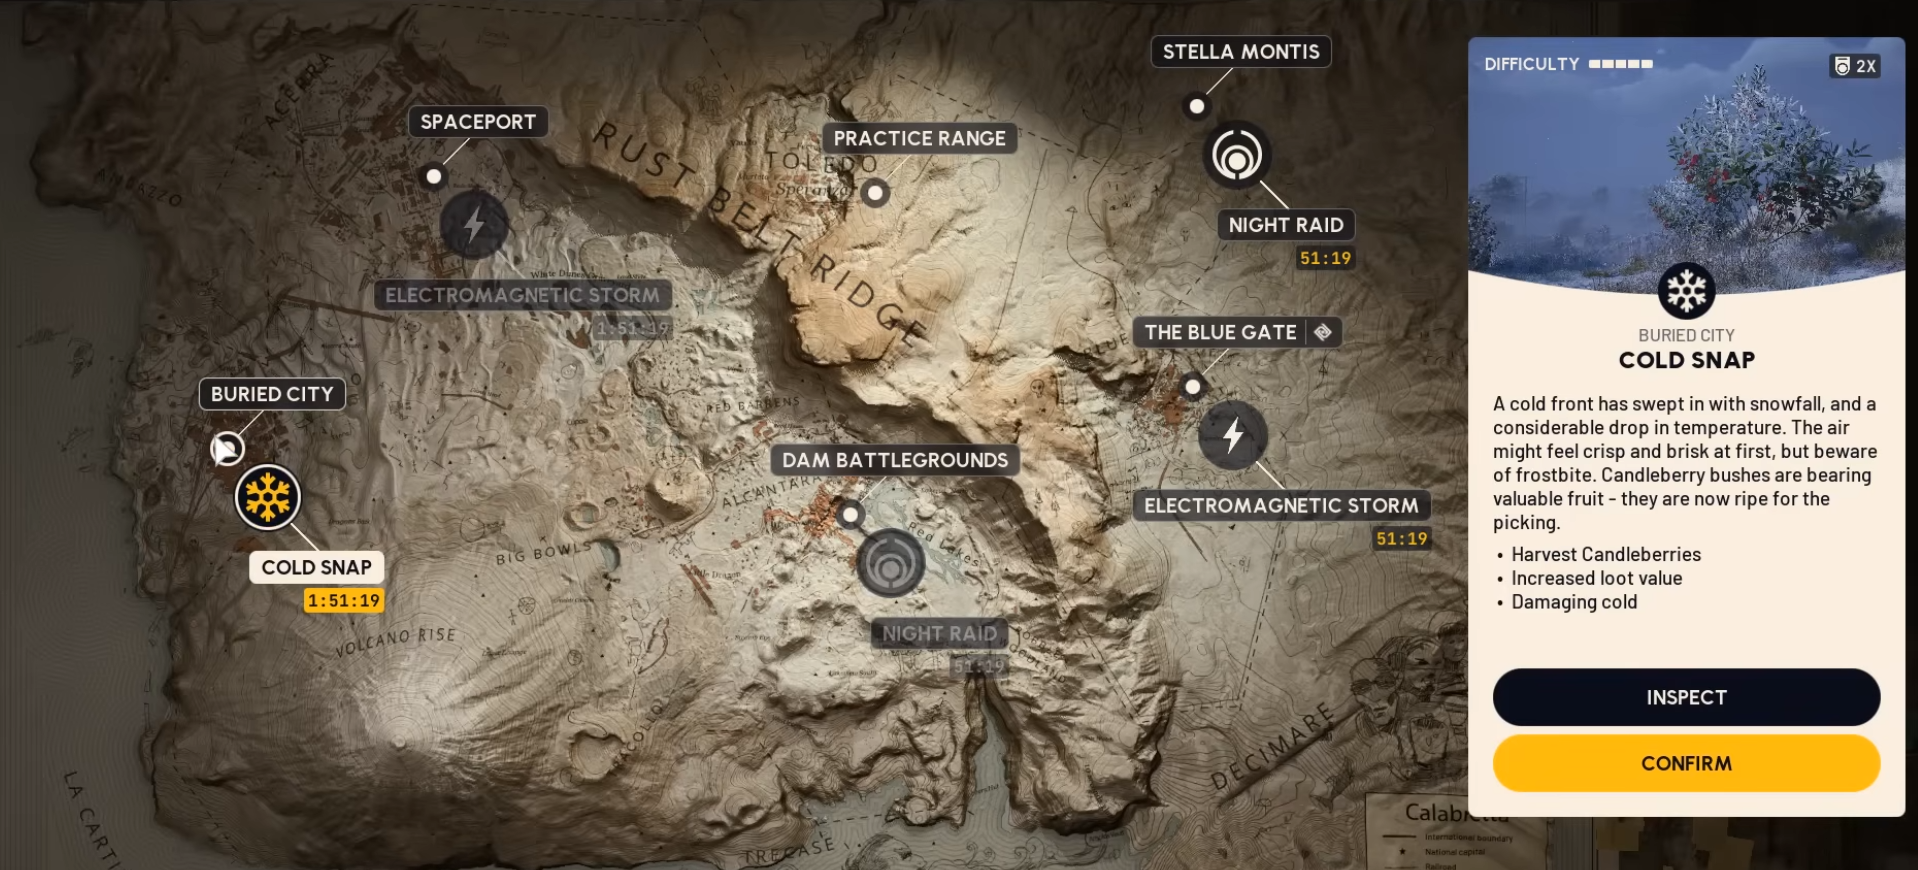
When Cold Snap hits:
-
Candleberries spawn as bright red bushes
-
They appear in vegetation-heavy areas, not dense industrial POIs
-
If Cold Snap isn’t active, you can run ten raids and see none at all
On Dam Battlegrounds, high-density Candleberry zones include the Hydroponic Dome Complex, Scrapyard, and Red Lakes, with additional spawns near trees and green areas. Individual bushes usually yield one Candleberry, while fruit baskets found in certain locations can contain up to five Candleberries, making them a high-priority pickup.
To complete the full Flickering Flames project, players need 260 Candleberries total across all five stages, commonly split into 20, 50, 60, 60, and 70. You can earn up to around 180 Candleberries directly from the event reward track, with the rest coming from Cold Snap farming.
Because Candleberry spawns reset every raid and don’t respawn during a single run, efficient farming usually means extracting quickly and re-queuing rather than trying to clear an entire map in one session.
For exact spawn locations, high-density routes, fruit basket spots, and map-by-map paths, link out to a dedicated guide here:
👉 Candleberry Spawn Locations Guide – ARC Raiders
Cold Snap Gameplay Changes
Cold Snap doesn’t add new enemies, but it tightens the screws on bad positioning.
Spending too long outside drains health, which changes how you approach fights. Long open-area duels become riskier, especially if ARC patrols wander in. Indoor routes, covered walkways, and quicker rotations matter more. If you’re used to squeezing every last container out of an area, Cold Snap is where that habit starts costing you.
How Cold Snap Works on the Map
Cold Snap applies a frostbite effect based on how long you stay exposed outdoors. After roughly a minute outside, your character starts shivering. After several minutes, visible snow patches appear on your clothing, followed by gradual health loss if exposure continues.
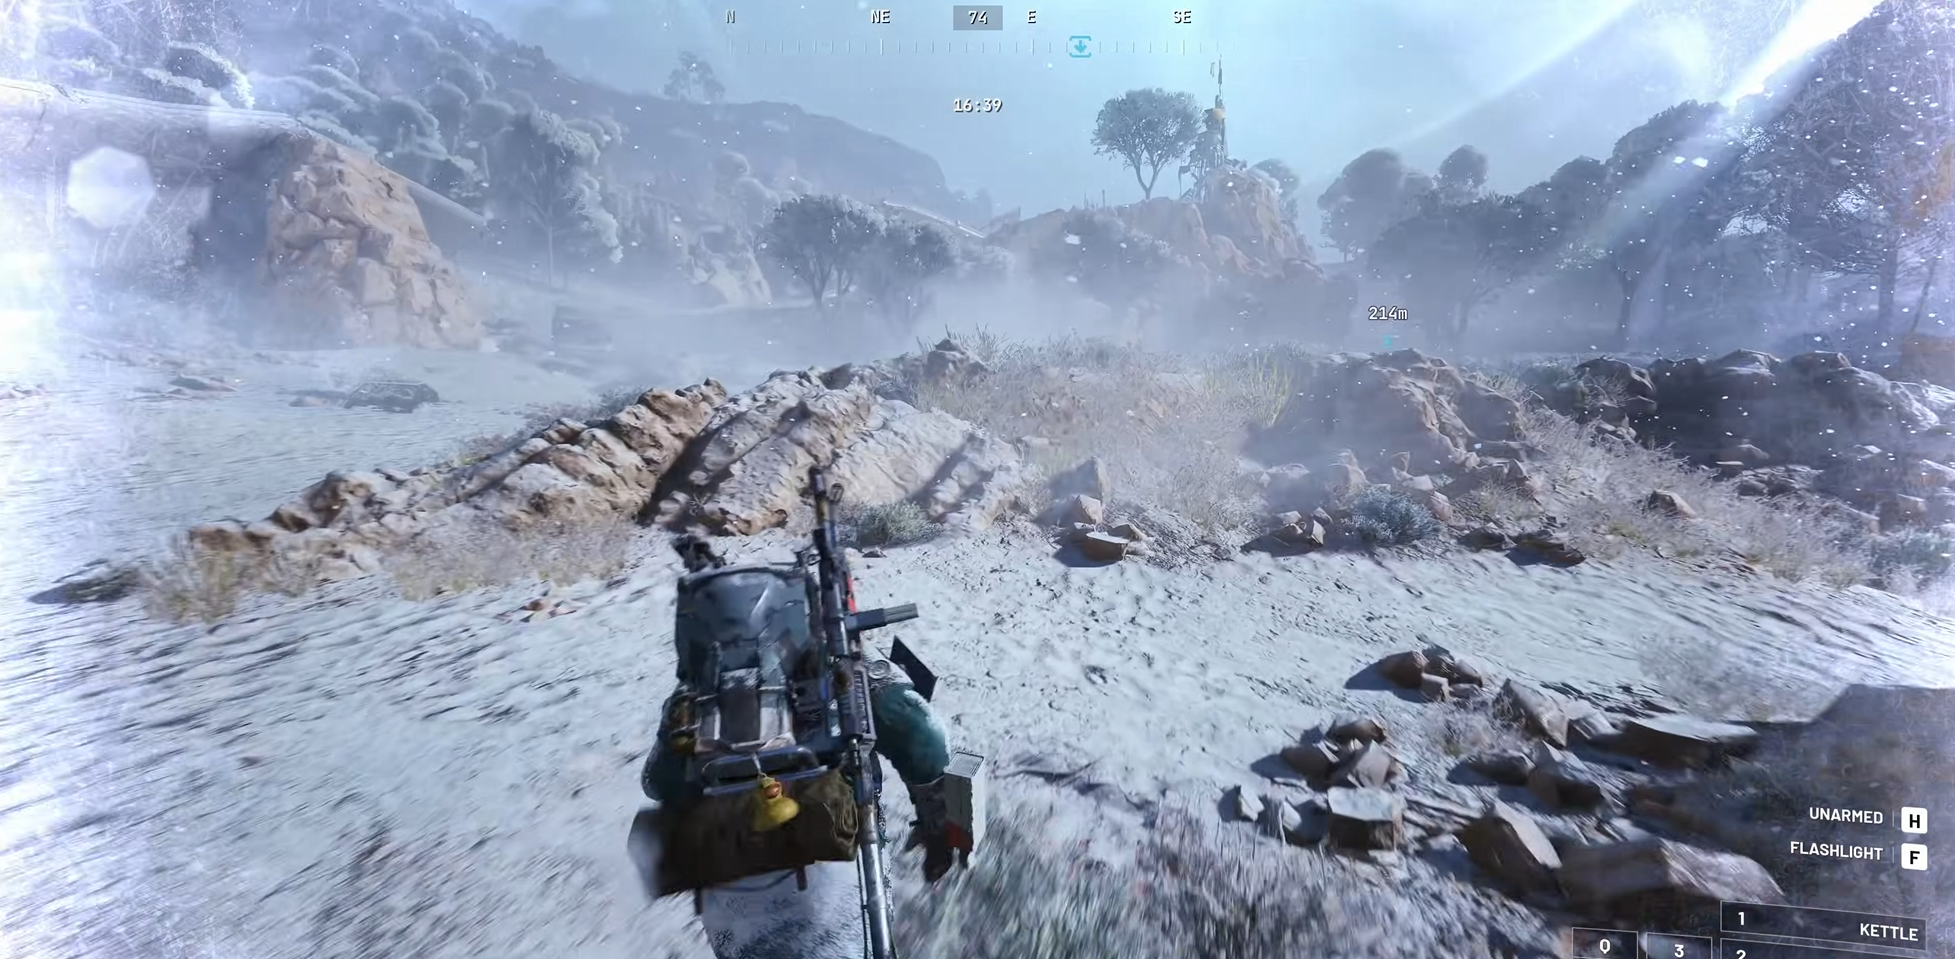
Entering a building stops the damage and begins clearing the frostbite effect. The visual snow on your character fades first, followed by normal health behavior. Stepping back outside immediately resumes exposure buildup, but damage only starts after the shivering phase completes again.
Not all cover counts the same. Fully enclosed interiors reset frostbite, while open structures like parking shelters or roofed areas still count as outdoors. Some edge cases, such as standing near balconies or enclosed ledges, count as indoor space and pause frostbite buildup, which can be used briefly to stabilize before moving on.
In practice, Cold Snap turns indoor routes into natural checkpoints. Short outdoor pushes between buildings work well, while extended travel across open ground steadily drains health and forces disengagement.
Most players adapt without thinking about it — extracting earlier, disengaging sooner, and avoiding drawn-out fights in exposed terrain.
Cold Snap also changes how long fights feel worth taking. Extended standoffs outside burn time and health without adding much value to event progress. Short engagements that resolve quickly keep raids flowing and make extractions more reliable. Over multiple days, this rhythm produces more consistent results than pushing every encounter to the limit.
Why Playing Regularly Matters
Flickering Flames is time-sensitive.
A few solid raids spread across the week feel effortless. Missing several days means you’re trying to compress that same progress into fewer sessions, which usually leads to longer playtime, sloppier raids, and more deaths.
Players who “suddenly feel behind” usually didn’t do anything wrong mechanically. They just weren’t around consistently. Most players who finish the event comfortably do so without changing their overall schedule. A handful of raids per session across the week keeps the reward track moving at a steady pace. When sessions cluster toward the end of the event, progress feels heavier because the same amount of work gets packed into fewer windows.
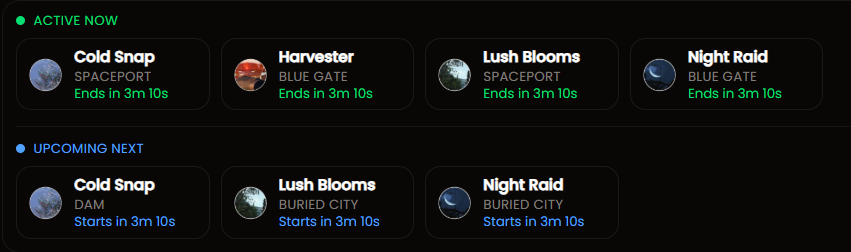
To keep track of when Flickering Flames and Cold Snap windows are active, it helps to check a live event timer instead of guessing. You can see current and upcoming ARC Raiders event phases here.
A lot of frustration comes from small misunderstandings:
-
Running Candleberry routes when Cold Snap isn’t active
-
Playing overly safe and extracting with low XP gains
-
Hoarding donation items until the last few days
-
Trying to brute-force progress during peak server instability
These patterns usually show up late, when time pressure kicks in. At that point, raids feel rushed, decision-making tightens, and progress feels harder than it did earlier in the event. Spotting these issues early keeps the experience smooth across the full duration instead of stressful at the end.
Final Thoughts
Because the event runs on a fixed schedule, real life can get in the way. Travel, work, or server issues can knock out several days without warning. When that happens, some players choose not to chase progress manually and instead let someone else finish event objectives once conditions stabilize.
LevelUpper’s ARC Raiders boosting services exist for that exact reason: finishing the reward track or donation stages without needing to log in every day. It’s a way to secure event items when availability — not ability — is the limiting factor.
Flickering Flames doesn’t demand anything special. Most of the event’s friction comes from timing rather than difficulty. Players who align their usual play habits with the event’s schedule finish without thinking much about it. Players who drift in and out tend to feel the pressure later, even though the mechanics stay the same. Run efficient raids, extract cleanly, adjust routes when Cold Snap is active, and donate as you go. Do that consistently and the event finishes itself. Ignore the timing, and it becomes stressful fast.
That’s the whole event, in practice.
FAQ
Once the Flickering Flames event ends, anything you already unlocked stays on your account. Anything you didn’t unlock is gone. Locked reward tiers, unfinished donation stages, and unclaimed event cosmetics expire when the event timer ends. There’s no rollover, no post-event catch-up, and no way to unlock missed items later.
Raids that stack multiple XP sources in one run. For example, a typical high-Merit raid includes looting two or three buildings, killing at least one ARC patrol like Rollers or Wasps, completing a quest interaction (panels, objectives, destructibles), and extracting successfully. Runs like this usually outperform longer raids where you hide, avoid fights, or die late. In practice, three clean extracts with full backpacks move the event track more than several short or passive attempts.
The total number of Candleberries depends on how you progress through the Flickering Flames event. You can earn up to around 180 Candleberries directly from the event reward track, with additional Candleberries found in Cold Snap zones during raids. In practice, Cold Snap bushes or caches usually yield 1–2 Candleberries each.
To complete the main Candleberry project, players typically need around 250–260 Candleberries total, depending on how many come from reward milestones. Project stages often require batches of 10, 20, 30, or 40 Candleberries, alongside common crafting materials. Players who collect berries consistently during Cold Snap and claim all track rewards usually finish without needing dedicated farming sessions.