

ARC Raiders Blueprint Boost

'%3e%3cpath%20fill='%23907ACC'%20fill-rule='evenodd'%20d='M6.541%201.786c-.827%200-1.619.324-2.201.9a3.044%203.044%200%200%200-.909%202.166v3.79c0%20.251-.143.468-.351.574a1.102%201.102%200%200%201-.787.327h-.825a1.56%201.56%200%200%201-.995-.35A1.275%201.275%200%200%201%200%208.214V7.186c0-.395.19-.743.473-.98.281-.233.64-.349.995-.349h.677V4.852a4.33%204.33%200%200%201%201.29-3.08A4.42%204.42%200%200%201%206.54.5a4.42%204.42%200%200%201%203.107%201.272%204.33%204.33%200%200%201%201.29%203.08v1.005h.594c.355%200%20.714.116.995.35.284.236.473.584.473.979v1.028c0%20.395-.19.743-.473.98-.281.233-.64.349-.995.349h-.19c-.039.368-.24.916-.674%201.393-.441.486-1.11.888-2.065.998a1.21%201.21%200%200%201-.248.268%201.407%201.407%200%200%201-.875.298h-.805c-.307%200-.624-.097-.876-.298a1.13%201.13%200%200%201-.437-.88c0-.365.182-.677.437-.881.252-.202.569-.298.876-.298h.805c.307%200%20.624.096.875.298.074.059.142.127.201.203.594-.09.947-.339%201.159-.572.14-.154.23-.314.285-.449a.96.96%200%200%200%20.063-.209V9.34a1.038%201.038%200%200%201-.287-.316.64.64%200%200%201-.125-.381V4.852c0-.811-.326-1.59-.908-2.166a3.132%203.132%200%200%200-2.202-.9ZM1.468%207.143a.277.277%200%200%200-.171.052.102.102%200%200%200-.01.01v.99a.102.102%200%200%200%20.01.01c.028.024.089.052.171.052h.594V7.143h-.594Zm9.47%200v1.114h.594a.277.277%200%200%200%20.171-.052.107.107%200%200%200%20.01-.01v-.99a.108.108%200%200%200-.01-.01.277.277%200%200%200-.171-.052h-.594Z'%20clip-rule='evenodd'/%3e%3c/g%3e%3cdefs%3e%3cclipPath%20id='a'%3e%3cpath%20fill='%23fff'%20d='M0%20.5h13v13H0z'/%3e%3c/clipPath%3e%3c/defs%3e%3c/svg%3e)
'%3e%3cpath%20fill='%23907ACC'%20fill-rule='evenodd'%20d='M6.199.557a.831.831%200%200%201%20.602%200l4.689%201.827c.308.12.51.41.51.734v4.567c0%202.518-2.147%204.8-5.25%205.777a.831.831%200%200%201-.5%200C3.17%2012.492%201%2010.45%201%207.685V3.118c0-.324.202-.614.51-.734L6.2.557ZM2.623%203.653v4.032c0%201.747%201.316%203.314%203.876%204.19%202.54-.882%203.878-2.647%203.878-4.19V3.653L6.5%202.142l-3.877%201.51Z'%20clip-rule='evenodd'/%3e%3c/g%3e%3cdefs%3e%3cclipPath%20id='a'%3e%3cpath%20fill='%23fff'%20d='M0%20.5h13v13H0z'/%3e%3c/clipPath%3e%3c/defs%3e%3c/svg%3e)
Rewards
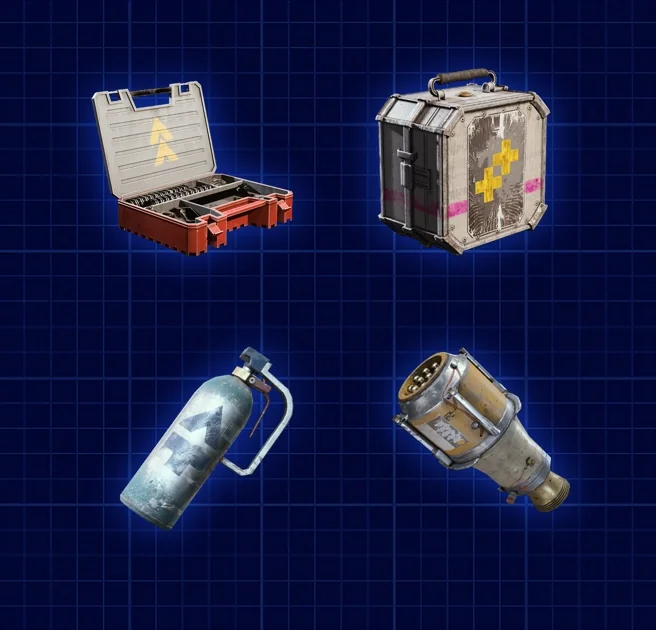
- 🎯 Selected blueprints unlocked permanently
- ⚔️ Armor modules for survivability builds from Gear Bench
- 💣 Grenades and mines from Explosives Station
- 🏥 Healing and revive tools from Medical Lab
- 🔧 Weapon attachments for better gun handling
Buy ARC Raiders Equipment Blueprints Boost and unlock armor modules, grenades, medical tools, and weapon attachments without endless night raids. Combat Mk.3 (Flanking) for mobility builds, Blaze Grenades for ARC melting, Defibrillators for squad support, and Vertical Grip III for recoil control – all farmed efficiently while you focus on extraction success instead of container RNG.
Requirements
An active ARC Raiders account is required for this blueprint boost service. No story progress gates exist for equipment blueprints, though upgraded Workshop stations (Tier II and Tier III) are needed to craft many advanced items once blueprints are learned.
If your Workshop isn't upgraded yet, consider adding our Workshop Leveling Service to unlock full crafting access for these blueprints immediately.
Other Arc Raiders Services You Might Be Interested In:
Additional Options
- Priority: Your ARC Raiders Blueprint Boost moves to the front of the order queue. Our boosters start blueprint farming ASAP instead of waiting in standard rotation, delivering recipes faster when you need specific modules or grenades for upcoming raids.
- Stream: Private stream link provided during your ARC Raiders Blueprint Boost sessions. Watch our boosters clear Security Lockers, navigate locked rooms, and extract with your selected blueprints in real-time – useful for piloted orders when you want transparency.
- Select Blueprints: Choose exact recipes you need from Gear Bench (Combat Mk.3/Tactical/Looting modules), Explosives Station (Blaze/Lure/Jolt/Explosive), Medical Lab (Defibrillator, healing tools), Utility Station (Snap Hook, Barricade Kit), or weapon attachments (grips, magazines, stocks, barrels).
- Workshop Upgrade: Add Workshop station upgrades alongside blueprint farming. We unlock Tier II and Tier III benches (Gear Bench, Explosives Station, Medical Lab) so you can craft advanced items immediately after learning blueprints without waiting for separate upgrade grinds.
Self-Play
You join our professional ARC Raiders farmers in squad for blueprint farming runs. We navigate optimal Security Locker routes, handle ARC encounters during container clears, and coordinate extraction timing while you stay active collecting loot, or we can simply trade you every required material directly if we already have them available, skipping farming entirely. Finish sessions with successfully extracted blueprints, learned recipes ready for Workshop crafting, and firsthand experience of efficient farming paths without solo RNG struggles.
Piloted
Our professional ARC Raiders farmers log into your account, deploy into optimal maps with efficient loadouts, farm Security Lockers and containers using proven routes, extract successfully with blueprints secured. You return to permanently unlocked blueprints ready for crafting and accumulated coins from duplicate sales.
Equipment Blueprint Service for ARC Raiders
ARC Raiders uses blueprint-driven progression where almost every meaningful upgrade beyond base weapons – armor modules boosting survivability, grenades controlling space, healing tools supporting squads, and weapon attachments improving gun handling – locks behind specific blueprint recipes. Equipment blueprints transform Workshop capabilities from basic crafting into strategic loadout customization where you build exactly what your playstyle demands.
The 75 total blueprints split across seven Workshop stations, with roughly 40% covering non-weapon equipment spanning Gear Bench armor, Explosives Station grenades and mines, Medical Lab healing devices, Utility Station mobility tools, Refiner upgrade materials, and weapon attachments improving recoil, magazine capacity, and handling. Without these blueprints your survivability, tactical options, and weapon performance remain permanently capped compared to fully equipped Raiders carrying Combat Mk.3 modules, Blaze Grenades, Extended Magazines, and Vertical Grips.
Blueprint System Mechanics and Permanent Unlocks
Blueprints function as consumable items you must extract from raids to secure. Finding a blueprint topside means nothing if you die before reaching extraction – the unlearned recipe drops from your corpse and vanishes unless another player recovers it. Once extracted safely to Speranza, you navigate to inventory, select the blueprint, and choose "Learn and Consume" to unlock the recipe permanently account-wide.
Every blueprint belongs to a specific Workshop station. Gear Bench handles all armor modules and augments, Explosives Station crafts grenades and mines, Medical Lab produces healing items and revive tools, Utility Station creates mobility gadgets and tactical equipment, Refiner converts raw resources into advanced materials, and weapon attachments distribute across multiple stations depending on attachment type.
Tier III blueprints require Workshop upgrades – many Combat Mk.3 modules and advanced explosives demand fully upgraded stations before crafting buttons activate.
Duplicate blueprints drop frequently since loot pools don't track learned recipes. When you encounter a duplicate, two options exist: sell it for flat 5,000 coins providing immediate currency, or arrange player-to-player trades by dropping the blueprint in-raid for squadmates who lack that recipe. Most players sell duplicates unless helping friends unlock specific equipment, converting excess RNG into steady income funding future crafting materials or market board purchases.
Gear Bench Armor Modules: Survivability Through Specialization
Gear Bench blueprints unlock armor modules defining your defensive, offensive, and utility specializations through three upgrade tiers. Tier I provides basic plates increasing health pools and simple utility slots for consumable storage. Tier II introduces specialization paths – Combat modules boosting damage output, Tactical modules improving movement and positioning, Looting modules increasing scavenging efficiency – where players commit to playstyle directions. Tier III grants Combat Mk.3 items representing late-game meta modules separating undergeared Raiders from fully optimized builds.
Combat Mk.3 (Flanking) stands as the mobility meta choice for aggressive players. The blueprint commonly spawns in Buried City residential areas, Security Wing locked rooms, Santa Maria apartments, and Marano Station loot rooms.
Once learned and crafted (requires Advanced Electrical Components and Processors), the module grants high mobility bonuses enabling faster positioning, quick escapes from bad engagements, and constant pressure through superior movement. Players running flanking builds combine this module with lightweight weapons and sprint-focused skill tree investments for hit-and-run tactics dominating ARC Raiders PvP.
Combat Mk.3 (Aggressive) shifts focus toward sustained firefights rewarding players who hold positions and trade damage efficiently. The blueprint drops from similar Buried City zones but requires different crafting materials emphasizing armor density over movement components. Aggressive module users pair it with heavy shields, sustained-fire weapons like LMGs, and defensive skill tree nodes creating unkillable anchors during territory control.
Tactical Mk.3 (Defensive) provides the ultimate survival tool for players prioritizing extraction success over kill counts. Defensive modules increase damage resistance, improve stamina regeneration for longer sprints when repositioning, and grant enhanced cover bonuses when holding advantageous positions.
Blueprints surface in locked container spawns across Dam Battlegrounds and Spaceport maps. Players running Tactical builds extract more consistently because they survive bad positioning through raw tankiness rather than requiring perfect execution.
Looting Mk.3 (Survivor) targets efficient farmers who maximize value per raid through superior scavenging. The blueprint unlocks faster looting speeds, expanded safe pocket capacity protecting additional items from death, and radar pings revealing nearby containers.
Survivor module users complete loot routes faster, secure more materials per extraction, and lose less when occasional deaths occur because safe pockets guard blueprint finds and rare components.
Explosives Station Grenades: Area Control and ARC Counters
Explosives Station blueprints transform tactical gameplay through grenades and mines controlling space, denying enemy movements, and countering specific ARC types where bullets fall short. Tier I unlocks basic frag grenades dealing direct damage, Tier II adds sticky payloads with delayed fuses and proximity triggers, Tier III grants rare area-of-effect control tools dominating Expeditions and high-risk night raids.
Blaze Grenade represents the single most valuable PvE blueprint in ARC Raiders. Fire damage creates sustained burn ticking multiple damage instances against ground ARCs – Bastions and Bombardiers standing in Blaze pools melt rapidly while you reposition safely. Community testing confirms 2,000-3,000 XP per grenade when chaining burns on single targets, plus 500 XP per husk part looted after kills. The blueprint drops from Security Lockers, locked room spawns, and containers across all maps with elevated frequency in Buried City Santa Maria district and Marano Station. Crafted using Explosive Compound and Oil, Blaze Grenades become repeatable tools converting modest material investments into consistent ARC kills generating massive XP gains during focused blueprint farming sessions.
Lure Grenade provides tactical distraction pulling ARC patrols away from routes or drawing player attention during PvP ambushes. The blueprint unlocks through Utility Station rather than Explosives Station (requires Speaker Component and Electrical Components), functioning as entry-level utility for players learning advanced positioning tactics.
Jolt Mine and Explosive Mine blueprints add area denial forcing enemies into predictable paths. Jolt Mines stun targets briefly after detonation, disrupting rushes and buying time for repositioning. Explosive Mines deal raw burst damage punishing careless movement through chokepoints.
Both blueprints drop from similar containers as grenade recipes but require upgraded stations for crafting. Mine users dominate extraction point defense by locking approaches with layered explosives, transforming extractions from mad dashes into controlled territory holds.
Medical Lab Healing Tools: Squad Support and Self-Sufficiency
Medical Lab blueprints produce healing items, revive tools, cleansers removing debuffs, and health stimulants enabling sustained combat without returning to Speranza. Late-game raids demand strong healing throughput – players attempting Expeditions or multi-hour night sessions require Medical Lab progression supporting extended topside duration.
Defibrillator blueprint unlocks the critical revive tool enabling squad recoveries during mid-raid disasters. When teammates drop during firefights or ARC swarms, Defibrillators restore them instantly without requiring manual revive channels exposing helpers to danger. The blueprint spawns in containers and locked room caches, requiring upgraded stations for crafting but instantly paying dividends through saved runs where single deaths don't force full extractions.
Advanced healing items provide combat sustainability beyond basic med kits. Cleansers remove burning, bleeding, and other damage-over-time effects crippling survival during prolonged engagements. Health stimulants grant temporary maximum health increases creating buffer against burst damage. Blueprints for these tools drop less frequently than basic healing recipes, but unlock options transforming fragile Raiders into sustained fighters handling multiple consecutive encounters without safe extractions between fights.
Utility Station Mobility and Tactical Equipment
Utility Station blueprints dramatically expand traversal options and tactical flexibility through mobility gadgets, deployable equipment, and reconnaissance tools converting standard movement into vertical advantages and information superiority.
Snap Hook grappling tool blueprint revolutionizes map navigation by enabling vertical climbs, rapid roof access, and shortcut routes bypassing ground-level chokepoints. The recipe requires upgraded stations plus crafting materials including Advanced Electrical Components and Rope. Snap Hook users dominate contested zones by accessing unexpected angles, escaping bad engagements through rapid vertical movement, and securing high-ground positions denying enemy approaches. Blueprint farming prioritizes Snap Hook because mobility advantages compound – every future raid benefits from superior positioning options unavailable to players lacking this tool.
Barricade Kit provides deployable cover creating instant defensive positions during open-ground firefights. The blueprint drops from tactical equipment containers and locked room spawns focusing utility over pure damage. Crafted through materials emphasizing metal plates and structural components, Barricades transform disadvantageous terrain into fortified positions. Coordinated squads deploy multiple Barricades creating layered defenses during extraction holds or Territory control scenarios, converting numerical disadvantages into positional dominance.
Remote Raider Flare and Tagging Grenade blueprints add reconnaissance capabilities marking enemy positions for squad coordination. Flares illuminate large areas revealing hidden players and ARC positions, while Tagging Grenades apply tracking markers to hit targets broadcasting locations through walls. These blueprints unlock tactical play unavailable through raw firepower – information advantages win fights before shots fire by enabling perfect ambushes and preventing surprise flanks.
Weapon Attachments: Improve your Arsenal
Weapon attachments blueprints improve existing firearms without requiring entirely new weapon recipes. Grips control recoil patterns, extended magazines reduce reload frequency during sustained fights, stocks improve handling and aim-down-sight speeds, barrels increase effective range. Attachment blueprints distribute across Gunsmith and Refiner stations depending on complexity.
Vertical Grip III and Angled Grip III blueprints represent mandatory upgrades for any serious weapon builds. Vertical Grips reduce vertical recoil bounce improving long-range accuracy, while Angled Grips stabilize horizontal drift enabling tighter spread patterns. Tier III versions provide best-in-slot recoil control unavailable through lower-tier alternatives, requiring upgraded Gunsmith and crafting from Complex Gun Parts
Extended Magazine blueprints (Light/Medium/Shotgun across Tier II and Tier III) fundamentally change weapon sustainability. Light weapon magazines extend SMG and pistol capacities enabling sustained suppression without reload windows. Medium magazines boost assault rifle and LMG uptime during prolonged firefights. Shotgun magazines reduce the critical vulnerability window after dumping shells during close-quarters brawls.
Extended Magazine blueprints drop from attachment-focused containers and locked armory rooms, requiring material investments in ammunition components and spring mechanisms. Every weapon benefits from extended capacity, making these weapon attachments universal upgrades applicable across entire arsenals.
Compensator III, Muzzle Brake III, and Shotgun Choke III blueprints fine-tune muzzle behavior for specific combat ranges. Compensators reduce overall recoil allowing faster follow-up shots, Muzzle Brakes specifically counter horizontal climb, Shotgun Chokes tighten pellet spreads for consistent one-shot-kill ranges.
These blueprints represent min-maxing territory where players already comfortable with gun handling push weapons into optimal performance brackets through percentage improvements compounding across hundreds of shots per session.
Extended Barrel and stock variants (Lightweight Stock, Padded Stock) blueprints address range and handling trade-offs. Extended Barrels increase bullet velocity and effective distance but add weapon weight slowing aim speed. Lightweight Stocks improve mobility and quick-scoping but reduce stability.
Padded Stocks boost stability for mounted positions but hinder sprint-to-fire times. Blueprint farming priorities depend on playstyle – aggressive flankers want Lightweight equipment, defensive anchors prioritize Padded and Extended options.
Blueprint Drop Locations and Farming Efficiency
Security Lockers require Survive skill tree level 36 unlocks but offer highest blueprint drop rates in ARC Raiders. These purple-tier containers consistently deliver rare blueprints while most players skip them entirely lacking proper skill investments. Security Locker routes prioritize Dam Battlegrounds Security Wing second-floor locked rooms, Buried City administrative buildings with keycard access, and Spaceport restricted zones where multiple Lockers cluster near high-traffic chokepoints.
Containers spawn in fixed locations across maps with contextual loot pools favoring specific blueprint types. Dam Battlegrounds relay stations and water treatment facilities concentrate weapon attachments, Buried City residential districts favor Gear Bench recipes, Spaceport technical zones drop Medical Lab and Utility Station blueprints.
Night missions dramatically increase blueprint spawn rates across all container types – the heightened risk from reduced visibility and aggressive ARC patrols pays dividends through substantially better loot quality.
Locked rooms require specific keys looted from guard posts, administrative offices, or enemy drops but guarantee blueprint spawns when accessed. Dam Battlegrounds Confiscation Room (key from village guard posts) contains rare blueprints focused on tactical equipment. Buried City Security Wing locked rooms concentrate armor modules.
Marano Station loot rooms provide consistent grenade and explosive recipe drops. Players farming specific blueprint categories target corresponding locked room zones rather than wandering aimlessly hoping for random container RNG.
Mission rewards provide guaranteed blueprint drops from faction questlines and main story progression. Early missions unlock basic utility blueprints (Lure Grenade, Launcher Ammo), mid-game quests reward weapon attachments, late-game faction reputation milestones grant exclusive recipes unavailable through world drops.
Harvester Events specifically reward energy weapon blueprints plus exotic materials like Magnetic Accelerators and Queen Reactors used crafting top-tier equipment. Professional Blueprint Boost services in ARC always maximize total blueprints acquired per session.
Why Professional Equipment Blueprint Boost Matters
Blueprint RNG punishes time-limited players through drop variance where some Raiders find Combat Mk.3 (Flanking) in first Security Locker while others farm fifty containers empty-handed. Extraction requirements compound frustration – finding blueprints means nothing if ARC patrols or PvP ambushes kill you before reaching extraction points. Every failed extraction wastes 20-30 minutes generating zero progression while risking expensive loadouts funding future attempts.
Workshop upgrade gates create secondary bottlenecks where blueprint acquisition only matters after stations reach required tiers. Finding Blaze Grenade blueprint accomplishes nothing without Explosives Station upgraded and crafting materials stockpiled.
LevelUpper's ARC Raiders Blueprint Boost can combine blueprints farming with Workshop Upgrade, enabling immediate crafting once upgrades complete.
Duplicate blueprint economics favor consistent farming over sporadic attempts. Each duplicate sells for flat 5,000 coins – sessions finding three-to-five blueprints (mix of new unlocks and duplicates) generate 10,000-20,000 coins alongside permanent recipe additions.
Over ten successful extraction sessions, accumulated currency funds market board attachments, vendor materials, and alternative equipment filling gaps between blueprint drops. Blueprint Boost service at LevelUpper maximizes this effect.
FAQ
What equipment blueprints are there?
ARC Raiders features approximately 40 non-weapon equipment blueprints across Gear Bench armor module, Explosives Station grenades and mines, Medical Lab healing tools, Utility Station mobility gadgets, and weapon attachments. Blueprint Boost service allows you to unlock all of them quickly.
How to get blueprints in ARC Raiders?
Extract successfully from raids with blueprint items in your inventory, return to Speranza, navigate to inventory, select the blueprint, and choose "Learn and Consume" to unlock the recipe permanently account-wide. Blueprints drop from Security Lockers (highest rates), containers, locked rooms requiring keys, mission rewards, and Harvester Events with night missions providing substantially increased spawn rates.
What are the most important equipment blueprints?
Combat Mk.3 (Flanking) dominates late-game mobility builds, Blaze Grenade melts ground ARCs efficiently for XP farming, Vertical Grip III provides best-in-slot recoil control for precision weapons, Extended Magazines (all tiers) universally improve weapon sustainability, Defibrillator enables critical squad revives, and Snap Hook revolutionizes map traversal through vertical mobility options unavailable without the grappling tool.
Can I lose blueprints after learning them?
Once you "Learn and Consume" a blueprint in Speranza, it becomes permanent account-wide unlock surviving stash wipes, seasonal resets, and character deaths. However, unlearned blueprints still in your inventory drop from your corpse if you die before extraction, losing the blueprint entirely unless recovered by squadmates or other players.
Where do Combat Mk.3 blueprints drop?
Combat Mk.3 (Flanking) and other armor modules commonly spawn in Buried City Security Wing second-floor locked room lockers, Santa Maria residential houses and apartments, Grandiose Towers rooftops, Marano Station loot rooms, and underground subway areas with repeatable container checks. Night missions substantially increase drop rates across these locations for Gear Bench recipes.
How does Blaze Grenade blueprint farming work?
Blaze Grenade blueprints drop from Security Lockers requiring Survive skill level 36, locked room caches across all maps, containers in contested zones, and mission rewards from faction questlines. The blueprint requires Explosives Station upgraded for crafting using Explosive Compound and Oil materials. Community testing confirms Blaze Grenades generate 2,000-3,000 XP per grenade against ground ARCs through sustained burn damage.
Do weapon attachments work on all guns?
Weapon attachments unlock crafting recipes for grips, magazines, stocks, and barrels compatible with specific weapon classes. Vertical and Angled Grips fit most primary weapons excluding shotguns, Extended Light Magazines apply to SMGs and pistols, Extended Medium Magazines boost assault rifles and LMGs, Shotgun-specific attachments only modify shotgun platforms. Check attachment compatibility through Gunsmith crafting menus after learning blueprints.
What Workshop level do I need for equipment blueprints?
Most basic equipment requires Workshop Tier I or Tier II, while advanced items demand Tier III unlocks. Combat Mk.3 modules require Gear Bench at maximum tier, Blaze Grenades need Explosives Station fully upgraded, Snap Hook demands Utility Station at highest level, and best-in-slot weapon attachments like Vertical Grip III require Gunsmith at top tier. Blueprint farming without Workshop upgrades means banked recipes awaiting future crafting access.
Can I sell duplicate blueprints?
Duplicate blueprints sell for flat 5,000 coins each through inventory menu or can be dropped in-raid for squadmates needing those recipes. Most players sell duplicates converting excess RNG into steady currency funding crafting materials and market board purchases rather than banking duplicate items consuming inventory space during equipment blueprints sessions.
How long does Equipment Blueprint farming take?
Blueprint acquisition depends on farming efficiency and RNG variance. Professional boosters clearing Security Locker routes and locked room spawns across Dam Battlegrounds, Buried City, and Spaceport typically find 3-5 blueprints (mix of new unlocks and duplicates) per 2-3 hour session through optimized pathing, consistent extractions, and proper night mission timing maximizing spawn rates unavailable during day deployments.
Is Equipment Blueprint Boost safe?
Professional blueprint boost services use manual gameplay matching legitimate player patterns through VPN-protected sessions, proper skill tree progressions, and natural farming routes avoiding detection systems. Thousands of completed piloted orders maintain perfect security records through strict account-handling protocols. Equipment blueprints services operate identically to normal play sessions focusing efficient container routes and successful extractions rather than exploits or automation.