


In Alpha, this shell was called Void. In current builds, it is called Assassin.
Direct comparison: this is basically Nightstalker from Destiny 2. Active Camo gives invisibility. Shadow Dive and Smoke Screen place smoke. Shroud gives more invisibility when you touch smoke.
Assassin in one line: smoke, invisibility chains, quick isolated kills.
This guide gives you real play patterns, a best build path, and fight decisions for team and solo runs.
Assassin Pros and Cons
Fast snapshot before the full breakdown.

Pros
- Smoke Screen blocks vision across wide open areas.
- Three stealth triggers (Active Camo, Shroud, moving through smoke) give repeated escape options.
- Strong at getting a quick kill and leaving before return fire.
Cons
- Cloak flickers whenever you fight, take hits, or use consumables.
- Base Tactical Recovery is weak, so bad camo timing is expensive.
- Recon Shell is a hard counter to Assassin.
Short version: shoot first, throw smoke, go invisible, repeat.
Stats
Stat spread is simple: strong movement and resist stats, weak Tactical Recovery.
Assassin is built to:
- Block enemy vision with smoke before or after you shoot
- Start fights from invisibility so you shoot first
- Change position right after first burst damage
- Finish close targets quickly when they lose track of you
- Leave bad fights fast instead of forcing a 50/50
Build rule: fix Tactical Recovery first. Then stack movement and possibly close-range damage so invisibility windows end in kills.
Like every other runner in Marathon, Assassin gains additional stats through faction upgrades. We only cover the baseline in this guide so you'll know what to look for from the get-go.
-
Tactical Recovery
Cooldown return rate for your Tactical ability.
Do not panic-cast Active Camo.
-
Heat Capacity
Determines how many movement actions (sprint, slide, jump moves) you can do before overheating.
Burst, reposition, burst again. Spam movement and you overheat.
-
Melee Damage
Baseline damage from melee and knife contact.
Average base value. Useful, but not the core of this build.
-
Prime Recovery
Recharge speed for your Prime ability.
Smoke Screen comes back often enough to plan entries and exits.
-
Self-Repair Speed
Rate of health and shield regeneration after combat.
Reset speed is average. Use smoke and cloak for safety.
-
Finisher Siphon
Amount of shield returned when you finish a downed Runner.
Decent stat, especially since you can easily manage a finisher inside a smoke cloud.
-
Hardware
Duration reduction for physical-control effects on your chassis (Immobilize, Overheat, Toxin).
Middle of the pack. Repeated control effects still beat you.
-
Fall Resistance
Mitigation against fall impact damage.
Honestly? This stat doesn't matter, since your Smoke Dive negates any fall damage.
-
Ping Duration
How long your enemy ping marker remains active.
Useful for comms.
-
Loot Speed
Speed at which container contents are exposed while looting.
Loot fast, leave fast.
-
Revive Speed
Time required to revive allies or complete self-revive actions.
Strong with smoke-cover revives under pressure.
-
Agility
Core mobility stat: run speed, directional pace, and jump height.
Your main stat. Powers flanks, gap closes, and exits.
-
Firewall
Duration reduction for electronic disruption effects (EMP, Hack) on your Runner systems.
EMP/hack hurts less, so escapes fail less often.
Build rule: get your camo cooldown back faster, then stack speed, melee/close damage or something else depending on your build.
Abilities and Traits
Core loop: throw smoke, go invisible, deal first damage, move before enemies re-aim your old spot.
Ability Description
Activate your shell's camouflage systems, pulling a shroud of invisibility over yourself.
Performing offensive actions, taking damage, and using abilities or consumables briefly disrupts your invisibility.
Ability Description
Activate while airborne to slam a smoke disc into the ground, deploying a smoke field at impact.
How To Use It
Shadow Dive is your emergency button: safe drops from height and instant smoke on landing.
Use It To
- Create cover in open ground where there was none
- Break enemy aim when you drop from a roof, hill, or catwalk
- Step into landing smoke to trigger Shroud invisibility
- Exit losing duels without giving free follow-up shots
With Safe Landing, impact can knock enemies back and make smoke last longer.
In team play, call your landing spot before you dive (roof edge, truck, lower ramp) so teammates can follow your pressure.
Good dives preserve your next move. If you overheat on landing, your follow-up is gone.

Ability Description
Your shell automatically activates camouflage when entering any smoke field, making you invisible.
Invisibility persists for a short time after leaving smoke.
How To Use It
Use It Intentionally
- Throw smoke in a line before crossing open space
- Use smoke grenades as backup invisibility triggers
- Step out to shoot, then step back into smoke to disappear again
- Cover revives, reloads, and armor swaps while enemies cannot see clearly
Each smoke pocket gives cover and another invisibility window.
Shooting, healing, taking damage, and using items reveal you for a moment. Expect it.
With Shadow Dive, this lets you push in or bail out even in open ground.
Do not move randomly in smoke. Pick an exit before entering.

Ability Description
Throw a smoke disc that emits a line of smoke fields in front of you, disrupting the optics of anyone inside.
How To Use It
Best Used When
- You need to cross open ground with multiple angles on you
- Your squad is stuck under enemy crossfire
- You need a safe path out after a third-party push
Each smoke segment can trigger Shroud, so one cast can give you several invisibility windows.
In team play, this makes enemies lose track of positions and slows their focus fire.
In solo, this is often your safest tool for rebuilding space after a bad peek.
Smoke Screen is not for damage. It is for making enemies unsure where to aim and where your team moved.
In long smoke fights, Assassin gets better timing because you can disappear and reappear from another spot.
Main counter is Recon: tracker drone and scan tools expose your position, even when you try to play sneaky. If Recon is present, change direction often and do not reuse the same smoke path twice.
How To Play Assassin
If the fight starts as a fair 1v1, you already lost value. Start from invisibility or smoke first.
Assassin in plain terms: go invisible, hit first, move to new cover, then hit again from a different side.
Your best games are the ones where enemies keep asking, "where did he go?"
Below are two practical patterns you can run repeatedly in live matches.
Team Scenario
You and your team need to cross an open cargo yard with catwalk angles watching your route.
Cast Smoke Screen diagonally across the yard so each smoke bubble blocks a different angle. While teammates move, pass through smoke one bubble at a time to trigger Shroud and stay hard to track.
An enemy on the rail spots you and starts shooting. Use Active Camo, then Shadow Dive onto mid cover to create fresh smoke. He loses line of sight, your backline gets free shots, and your team takes ground.
Team value is simple: break enemy vision first, then deal damage while your squad gets easy shots.
Solo Scenario
You are moving alone between loot zones across a wide open area and get spotted first.
Do not take that open-ground 50/50. Use Active Camo, break immediate aim tracking, and move to hard cover. If they keep pushing, use Shadow Dive for emergency smoke at your next cover point.
If they chase, move left-right through smoke and shoot from a new angle. Do not stand still and trade from one spot.
In solo, mistakes get punished hard. Better timing means safer extracts.
Best Cores and Implants
Main build here is non-melee: stealth gunplay, clean resets, and consistent value every fight.
What we do not recommend: Silent Killer. For a Prestige core, requiring back-hit melee is too conditional. If you are already behind someone, you usually already won the exchange. In our opinion, this is a wasted slot.
Best build in our opinion: Minus Sights + Guerrilla, then Ping+ V4, Survival Kit V3, and Graceful Landings V4.
Cores

After aiming down sights for a short time, you become invisible at the cost of generating heat.

Increased damage from steath.
Implants

Never There: entering smoke removes any pings on you.
- Loot Speed+15
- Hardware+10
- Ping Duration+20
No competition in our opinion. You touch smoke and enemy pings drop. That is obvious value for Assassin pathing and escapes.

Snapshot Rifling: readying a weapon briefly increases its accuracy and range.
- Self-Repair Speed+15
- Revive Speed+15
- Hardware+15
- Firewall+15
- Ping Duration+15
All lines are useful for this style. You get consistency, survivability, and better mid/long gun openings without forcing melee.

Frenzy Matrix: defeating a hostile increases tactical ability recharge rate and sprint speed for a short time.
- Agility+20
- Melee Damage+20
- Fall Resistance+50
Great for this non-melee setup too: movement, safe vertical play, and kill-to-momentum loop for the next fight.
Melee alternative (secondary recommendation): if you specifically want knife/close kills, run Shadow Strike and switch leg slot to a melee-leaning option like Bionic Leg Upgrades V3. That is a separate build path, not the main one here.
Also playable while gearing: Breathing Space, Patience, Safe Landing, and Flex Weave Casing. Good options, but less consistent than the main setup above.
How This Setup Works
This setup is gun-first Assassin, not melee-first Assassin.
Loop: smoke for information denial, clear pings on smoke entry, shoot first from invisibility, move before the trade.
Minus Sights gives invisibility windows even when smoke is not placed yet. That makes your first shot timing much harder to read.
Guerrilla is the pressure core in this setup. It gives repeatable stealth value instead of conditional melee value.
Ping+ V4 is the anchor. Enter smoke, drop pings, break enemy information, and force guesswork.
Survival Kit V3 gives clean all-around stats and Snapshot Rifling, which fits mid/long stealth gunfights better than melee-centric torso picks.
Graceful Landings V4 keeps vertical movement safe and snowballs after kills with faster tactical recharge and sprint burst.
Net result: you play angles, timing, and information better than most players can react to.
No high-tier gear yet? Keep the same order: camo cooldown first, movement second, damage third.

End state: opponents lose track of you, chase bad positions, and die in short-range windows you control.
Best Weapons for Assassin
Precision rifles or sniper rifles feel most intuitive here. We recommend precision rifles first, because you usually keep moving and zig-zag through smoke instead of sitting still for long scopes.
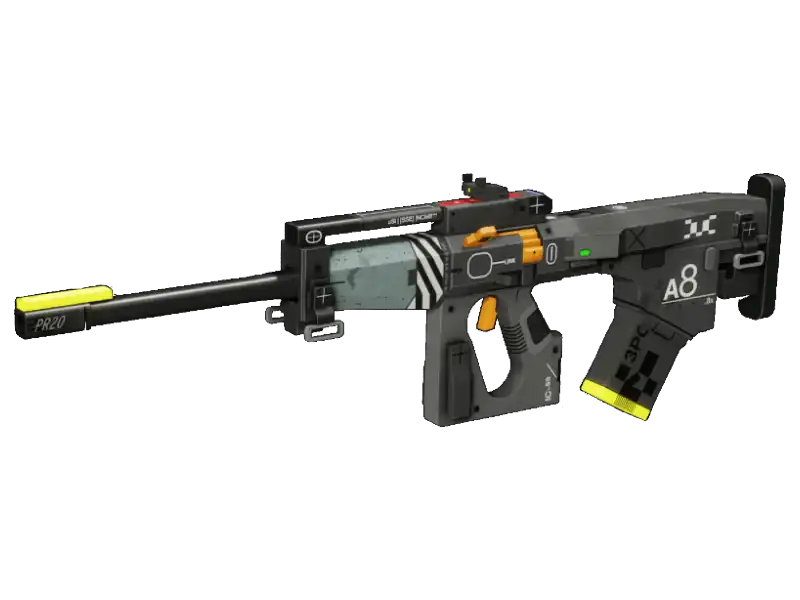
- Weapon ClassPrecision Rifles
- Ammo TypeLight Rounds
Semiautomatic precision rifle with three-round burst fire.
Carry a close-range backup as secondary, but keep your main plan as precision pressure from stealth windows.
Need Help Building Assassin?
Assassin feels strong only when your cooldowns and movement are built correctly.
Getting the exact weapons, cores, and implants you want takes a lot of time. We can help you save that time.
We can:
- Accelerate account progression and unlock pace
- Build your Assassin the way you want, fast
- Source specific Weapons, Cores, and Implants on request
- Run custom objectives tailored to your Marathon goals
Missing cores/implants for this build, or just want your rank up fast? Check our Marathon Boosting Services. Use code LUBLOG10 for 10% off.
FAQ
The most consistent competitive setup is:
Minus Sights + Guerrilla
Ping+ V4
Survival Kit V3
Graceful Landings V4
This build focuses on stealth gunplay, information denial, and repeatable first-shot pressure. You gain extra invisibility windows from aiming, bonus stealth damage, ping removal on smoke entry, and strong mobility after kills.
Melee-focused variants are playable, but the overall consistency drops compared to this gun-first setup.
Precision rifles are the most reliable choice.
The BR33 Volley Rifle fits perfectly with smoke repositioning and short invisibility windows. You can deal burst damage, relocate, and re-peek from another angle without committing to long scope time.
Carry a close-range secondary for emergencies, but your main strength is controlled mid-range pressure from stealth.
Not in most competitive scenarios.
Silent Killer requires back-hit melee confirmation, which is too conditional for a Prestige slot. If you are already directly behind a target, you likely controlled the fight anyway.
Guerrilla provides consistent stealth damage without forcing melee-only plays, making it more reliable across different fight types.
Tactical Recovery first. Agility second. Then close-range or precision damage depending on your weapon choice.
Assassin has very low base Tactical Recovery, so wasted Active Camo is extremely punishing. Reducing that downtime increases survivability more than stacking raw sustain stats.
After cooldown stability, mobility and burst damage scale better than defensive stacking.
If a fight starts as a fair 1v1 in open ground, you already lost value. Assassin shines when you shoot first, reposition before return fire, and reset inside smoke.
When cooldowns are managed correctly and you avoid straight-line pushes, Assassin is one of the strongest Shells for creating chaos and forcing bad chases in solo play.
How To Use It
Use It To
Press it with a destination in mind. No route = wasted cooldown.
Where It Fails
Solo rule: before you engage, know your two outcomes. Finish fast, or leave immediately.
With only 5 Tactical Recovery, wasting Active Camo means enemies can run you down while it is still on cooldown.