


Expedition Project is back for round three. If you've gone through Expeditions 1 and 2, you know the drill – construct a caravan, load it with supplies, and send your Raider beyond the Rust Belt for permanent account rewards. But Expedition 3 shakes up the material requirements significantly, swapping several familiar items for completely new ones.
Gone are Shredder Gyros and Cooling Coils. In their place: Firefly Burners, Bombardier Cells, Breathtaking Snow Globes, and other materials that demand different farming strategies.
Whether this is your first Expedition or your third consecutive departure, this guide covers every stage requirement, where to find each material, and how to max out your stash value before the window closes. Expedition 3 departure window opens April 29 and closes May 4, 2026. Plan accordingly – rushing the final week when you could've been stockpiling passively for two months is a rookie mistake.
How Expedition Project Works
Expedition Project unlocks at level 20 through the Projects tab in your Raider menu. Each cycle runs approximately 60 days for construction and supply phases, followed by a departure window of about 7 days. Miss that window and you lose access to temporary buffs until the next cycle – though contributed materials and stage progress carry over.
Completing an Expedition resets most character progression. It's a voluntary prestige system, not a forced wipe. Your Raider persists indefinitely if you choose not to participate.
- Unlocked maps
- Workshop station unlocks (not levels)
- Codex entries
- Raider Tokens and Cred
- Raider Decks progress
- Leaderboard standings
- Trials progress
- All cosmetics
- Trophy Display progress
- Permanent Skill Points & Stash Slots from Expeditions
- Player level and skill points
- Inventory and stash items
- Blueprints
- Coins
- Workshop benches (reset to level 1)
- Raider Den progress
- Active quests
- Stash upgrade progress
Expedition 3 Rewards
- Patchwork Raider (evolved) outfit – 4 toggles, 2 color options
- Scrappy cosmetic
- Expeditions Indicator icon
- +12 Stash slots (24 total across Expeditions)
- Up to 5 bonus Skill Points (1 per 600k stash value)
- Catch-up mechanic for missed Skill Points at discounted cost
- +6% Scrappy materials per stack (max 18% at 3x)
- +5% XP boost per stack (max 15% at 3x)
- +10% repair buff per stack (max 30% at 3x)
- Buffs last until next Expedition departs
- Missing one departure resets the stack
Expedition 3 Timeline
Stage 1: Foundation
Requirements
 |
150x Metal Parts Recycle almost anything – industrial debris, broken electronics, weapons. Common on every map. Celeste sells some daily. |
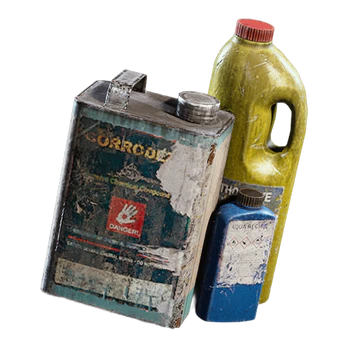 |
100x Chemicals NEW Replaces Plastic Parts from Expedition 2. Recycle ARC Coolant, Cooling Coils, Synthesized Fuel, and Oil. Found in Industrial and Technological areas. Craft at Refiner using Oil + Synthesized Fuel. |
 |
80x ARC Alloy Drops from all ARC enemies. Bigger ARCs like Leapers and Bombardiers drop more. Dam Battlegrounds, Spaceport, Buried City, Blue Gate all work. |
 |
15x Steel Springs Industrial areas and broken vehicles on all maps. Salvaging Turbo Pump gives 3 Springs. Buy from Celeste (6 Seeds each, 10 daily) to skip farming. |
Where to Farm
Stage 1 is the easiest – most of these materials accumulate naturally through regular play. Metal Parts come from recycling virtually anything, so just play the game and you'll have 150 within a few sessions.
Chemicals are the only new requirement here. ARC Coolant and Cooling Coils recycle into Chemicals, and both drop frequently in Industrial zones on Dam Battlegrounds. Oil spawns in vehicle wrecks and industrial containers across all maps – grab it whenever you see it.
ARC Alloy comes from killing any ARC. Focus on weaker targets like Ticks and Pops for efficient farming if you're grinding it out. Dam Battlegrounds has the densest ARC population in accessible areas.
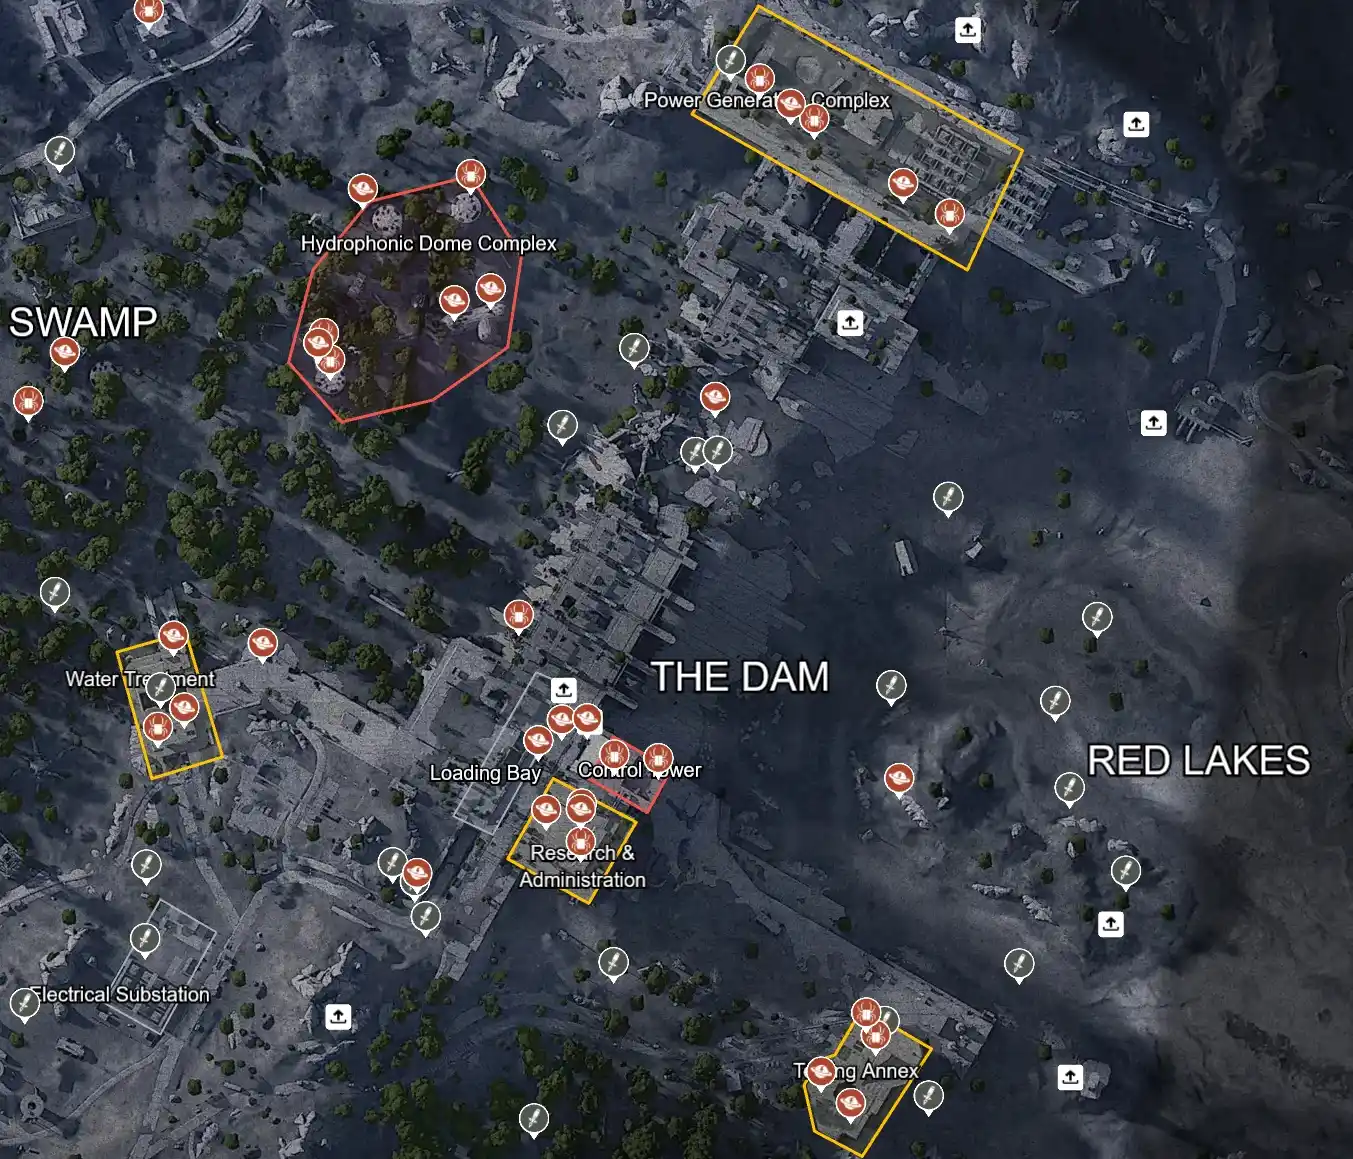
Steel Springs require slightly more targeted farming. Dam Battlegrounds Power Generation Complex basement and Water Treatment side rooms spawn them consistently. Alternatively, buy 10 daily from Celeste at 6 Seeds each – two days of purchases covers the requirement entirely.
Stage 2: Core Systems
Requirements
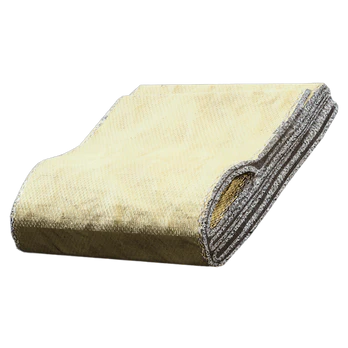 |
30x Durable Cloth Craft at Refiner using 14 Fabric each, or purchase from Celeste. Recycle Ripped Safety Vests (1 each) and Spring Cushions (2 each). Residential and Medical zones drop it directly. |
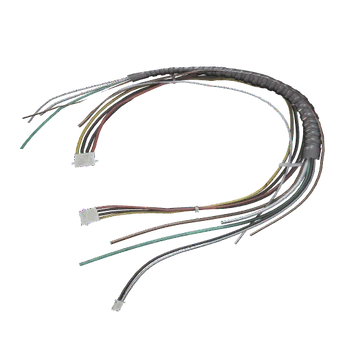 |
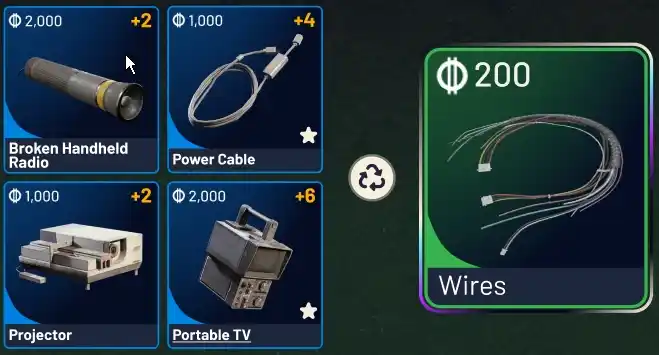
25x Wires Electrical and Technological areas. Recycle: Broken Handheld Radios, Power Cables (3 wires each), Portable TVs, Projectors. Buy from Celeste. |
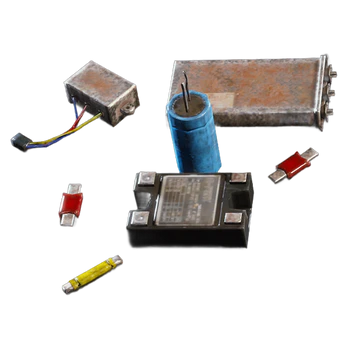 |
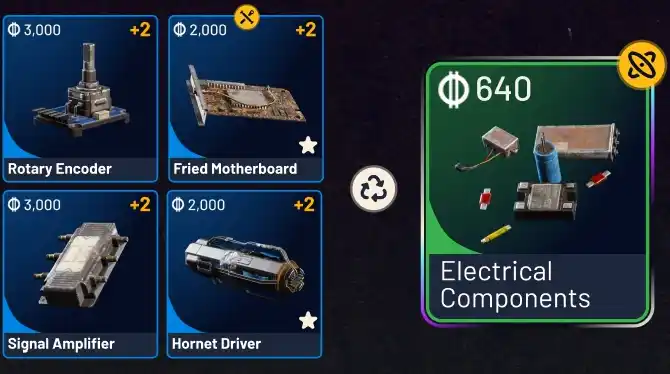
20x Electrical Components Craft at Refiner or loot from Electrical zones. Recycle Wasp and Hornet Drivers. ARC salvage occasionally yields them. |
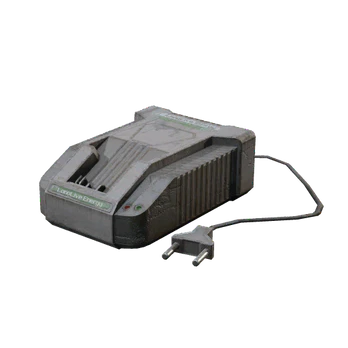 |
3x Industrial Chargers NEW Replaces Cooling Coils from Expedition 2. Rare item found in Electrical and Industrial areas. Recycle Voltage Converters to get them. |
Where to Farm
Durable Cloth is best crafted rather than farmed. Build it at Refiner using 14 Fabric per cloth – Fabric is everywhere in Commercial and Residential zones. Hospital in Buried City and Medical buildings on Dam Battlegrounds also drop Durable Cloth directly if you'd rather loot it.

Wires come from Electrical and Technological areas on Dam:
- Power Generation Complex (Dam): Interior hallways and electrical panels on building exteriors. Computers and server boxes consistently drop wires.
- Control Tower (Dam): Both Electrical and Technological loot. Thorough facility hallway search yields 5-10 wires per run.
- Research & Administration (Dam): Upper floors accessed via yellow zipline behind the main desk. Check every computer, server box, and CRT monitor.
Power Cables found in these areas recycle into 3 wires each – grab them even if they seem like junk.
Electrical Components craft at Refiner using basic materials, or loot directly from tech facilities. Crafting is more reliable than farming.
Industrial Chargers are the new Stage 2 bottleneck, replacing Cooling Coils. They spawn in Electrical and Industrial zones with lower frequency than common materials. Dam Battlegrounds and Spaceport have the best spawn rates. Voltage Converters recycle into Industrial Chargers, so check electronics-heavy areas like Control Tower and Power Generation for those. You only need 3 – manageable in a few focused runs.
| If that sounds like too many runs, we've included a discount code near the end of the article. |
Stage 3: Framework
Requirements
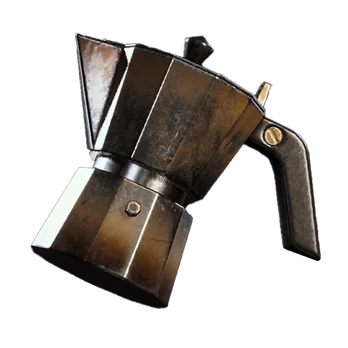 |
1x Coffee Pot NEW Replaces Light Bulbs from Expedition 2. Common trinket found in Residential areas on all maps. Extremely easy to find. |
 |
25x Batteries Electrical and Technological areas. Recycle Industrial Batteries (2 each), Recording Panels, Oscilloscopes, Computers. Buy from Celeste (5 Seeds each). |
 |
5x Firefly Burners NEW Replaces Shredder Gyros from Expedition 2. Exclusive drop from killing Firefly ARCs. Fireflies spawn on all maps but are most common on Spaceport and Blue Gate. |
 |
1x Exodus Module Epic item from Exodus zones on Stella Montis. Buy 1 daily from Celeste (20 Assorted Seeds). Recycle Geiger Counters, Ion Sputters, or Spectrum Analyzers. |
Where to Farm
Coffee Pot is trivial. One spawns in nearly every Residential building. You'll likely find it without even trying – check any house on Dam, Buried City, or Blue Gate.
Batteries accumulate through recycling faster than farming. Buy from Celeste at 5 Seeds each, recycle Industrial Batteries for 2 regular ones, or hit the Stella Montis Control Room near Cargo Dock B – server stacks there spawn 10-15 batteries per container.
Firefly Burners are the Stage 3 bottleneck and the biggest change from Expedition 2. Instead of hunting Shredders on Stella Montis, you're now targeting Fireflies – airborne ARCs that patrol open areas across all maps.
Firefly Killing Strategy
Fireflies resemble Hornets but have a distinctive flat, jet-fighter profile with a tiny metal plate on top. They carry a flamethrower that shreds shields at close range, so fighting them in the open gets ugly fast. If you want to know where to find and how to find Fireflies check out our guide.
Exodus Modules drop from Exodus POIs – look for the eye-and-half-moon icon on your Stella Montis map. Assembly Workshop has the highest confirmed spawn rate. You can also purchase 1 daily from Celeste for 20 Assorted Seeds, or recycle Geiger Counters, Ion Sputters, and Spectrum Analyzers.
Skip the entire Expedition grind with LevelUpper's Expedition Boost – we complete all 5 stages and maximize your stash value for departure.
Stage 4: Outfitting
Requirements
 |
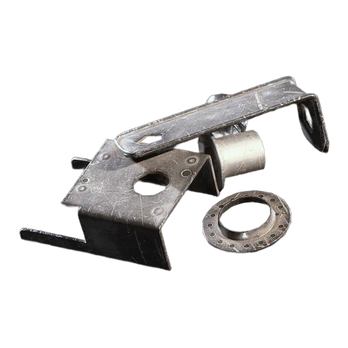
1x Broken Guidance System NEW Rare item found in Industrial areas on any map. Also listed as safe to sell/recycle normally – just keep one when you find it. |
 |
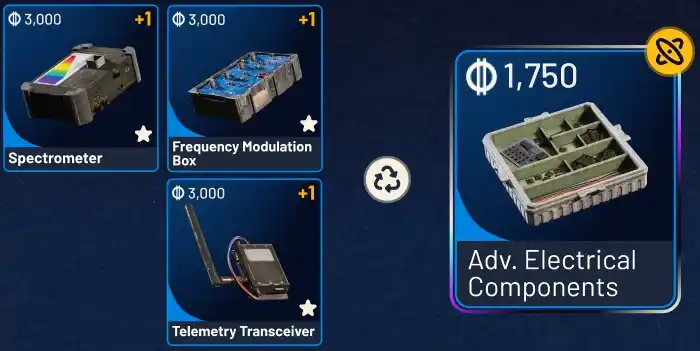
5x Advanced Electrical Components Craft at Level 2 Refiner (5 Electrical Components each). Recycle Mk. 3 Augments, Photoelectric Cloaks, Power Rods, Rocketeer Drivers, or Telemetry Transceivers. |
 |
3x Breathtaking Snow Globes NEW Replaces Ion Sputters from Expedition 2. Epic trinket found in Residential, Commercial, and Old World areas on any map. Very low drop rate. |
 |
2x Bombardier Cells NEW Replaces Leaper Pulse Units from Expedition 2. Drop from killing and looting Bombardier ARCs. Best farmed on Buried City and Blue Gate. |
Where to Farm
Stage 4 is where Expedition 3 gets interesting. Three of four items are completely new, and two of them need specific farming strategies.
Broken Guidance System is surprisingly easy despite being Rare. It spawns in Industrial areas and you only need one. Check industrial buildings on Dam or Spaceport – you'll find it within a couple runs. It's on the Master Cheat Sheet's "safe to sell" list, meaning many players recycle these without thinking. Now you have a reason to keep one.
Advanced Electrical Components craft at Level 2 Refiner using 5 Electrical Components each. Total cost: 25 Electrical Components for 5 Advanced ones. If your Refiner isn't Level 2 yet, you'll need to upgrade first – ARC Raiders Workshop Boost handles station upgrades quickly.
Breathtaking Snow Globe Farming
Snow Globes are the Expedition 3 bottleneck. They're Epic-rarity trinkets that only spawn in Residential, Commercial, and Old World buildings. The drop rate is extremely low – expect multiple runs before finding even one.
- Buried City (best): Grandioso Apartments, Santa Maria Houses, Red Tower, Piazza Arbusto, and Space Travel Building. Dense building clusters with tons of containers in every room.
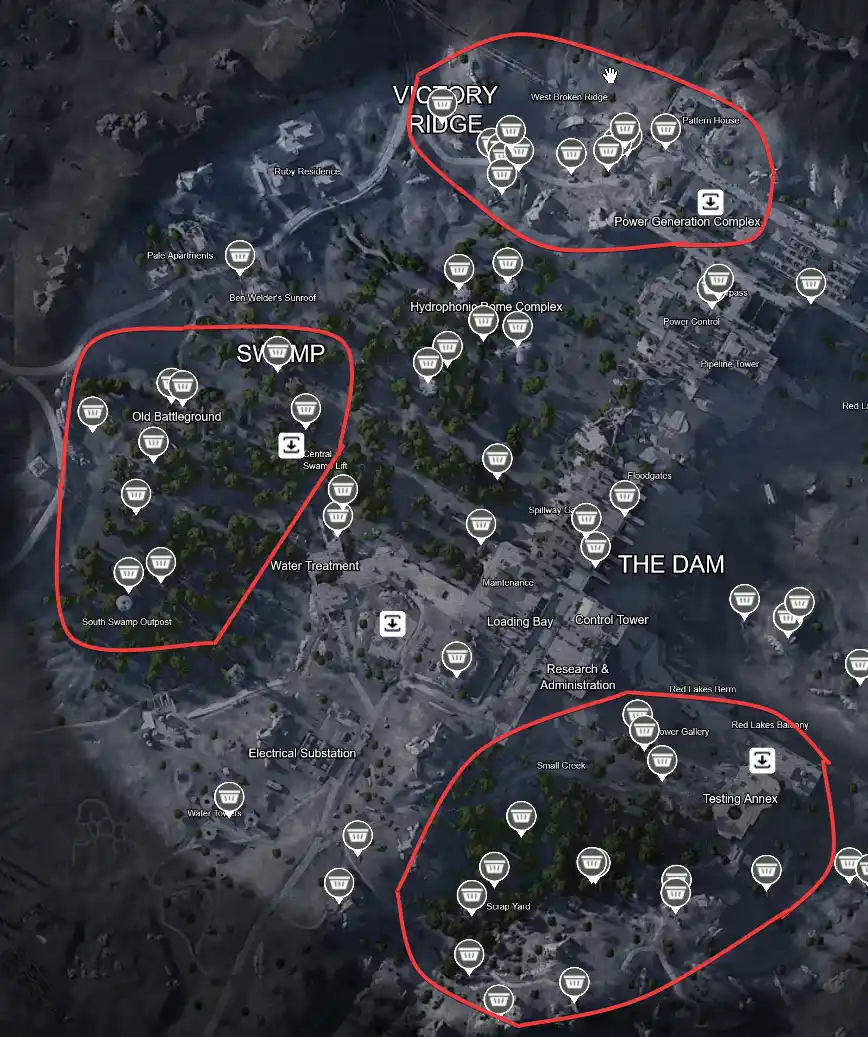
- Dam Battlegrounds: Pale Apartments and Ruby Residences in the northwest. Good container density, especially during Electromagnetic Storm.
- Blue Gate: Village buildings and refugee site areas contain Residential loot.
Farming tips: Run during Night Raid or Electromagnetic Storm conditions for increased rare item spawns. Focus on red lockers, breach containers, and high-value loot zones. Equip Security Breach perk if you have 36 Survival points for access to secure lockers.
Naked run strategy: Enter without gear to get a Safe Pocket automatically. Loot Residential areas, find a Snow Globe, put it in Safe Pocket, surrender. Zero risk, guaranteed progress. Repeat until you have all 3.
Bombardier Killing Strategy
Bombardiers are large, heavily armored ARCs that fire mortars and deploy Spotter drones. They're significantly tougher than Fireflies but you only need 2 Cells.
- Best locations: Buried City (Marano Park, Plaza Rosa, parking garage upper level) and Blue Gate (between Library and Town Hall, near extraction).
| Don't feel like hunting Bombardiers and grinding Snow Globes? There's a promo code near the end. |
Stage 5: Load Stage
Requirements
Stage 5 doesn't ask for specific items. Instead, you donate inventory items based on their coin value across four categories. Think of it as loading your caravan with supplies for the journey.
How to Fill Each Category
- Combat Items (200k): Craft cheap weapons like Rattlers or Kettles specifically for donation. Epic weapon mods and purple attachments carry high value if you've been hoarding them.
- Survival Items (100k): Bandages and basic Shields craft cheaply and add up fast. Smallest category – usually fills naturally while grinding other stages.
- Provisions (150k): Trinkets (Playing Cards, Albums, Statuettes) have no crafting use, so dump them here. Buried City produces massive Provision value from its Commercial and Residential zones. This is the fastest provisions farming method.
- Materials (300k): Your accumulated crafting stockpile goes here. If you've been playing actively, you likely have 300k in materials sitting in stash already. Buried City runs produce both Provisions and Materials efficiently.
Stage 6: Departure
No materials required. Once Stages 1-5 are complete, wait for the departure window (April 29 – May 4, 2026). Click "Depart" to send your Raider beyond the Rust Belt, triggering reset and reward distribution.
Your final stash value (items plus coins) at departure determines bonus skill points: 1 skill point per 600,000 value, maximum 5 points (3,000,000 total). This mechanic creates the real endgame grind.
Skip the tedious grind entirely with ARC Raiders Expedition Boost – we complete all 5 stages and maximize your stash value for departure.
How to Hit 3M Stash Value
ARC Raiders Expedition rewards extend beyond Load Stage. At departure, your combined stash value (items plus coins) grants bonus skill points: 1 point per 600,000 value, maximum 5 points. Hitting 3,000,000 before departing gives your next Raider a massive head start.
Most players finish Stage 5 around 750k, then realize they still need over 2M more. Here's how to bridge that gap.
Lush Bloom Event Farming | Fruit Basket Farm
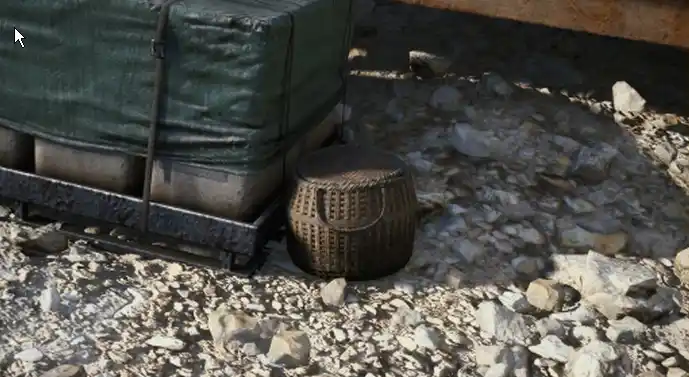
When Lush Bloom events activate, fruit baskets spawn near Raider Camps across Dam Battlegrounds and Spaceport. Each basket contains items worth approximately 10,000 coins. Chain 7-15 baskets per run.
Route: Check interactive maps showing basket spawn markers. Plan routes connecting Raider Camp locations. Loot and leave – don't overstay for fights. Bad spawns net 20-25k per run; solid runs hit 30-35k; great Lush Bloom runs reach 70-120k.
Stella Montis Container Runs
Stella Montis offers consistent value through toolboxes, blue cabinets, and backpack containers. Map layout supports fast looting with multiple extraction options.
Route: Sweep toolboxes and blue cabinets. Hit breach engines (one crouch vault). Clear 4 breach rooms then extract via Lobby Metro. Learn the Assembly-to-Metro jump for instant extraction. With Looting Mk.2 perk and Raider Hatch Keys, expect 50-80k in 6-10 minute runs.
Best loot locations on Stella Montis:
- Medical Research: Highest value but heavy PvP. Vita Sprays, blue bandages, rare workshop materials, Epic loot.
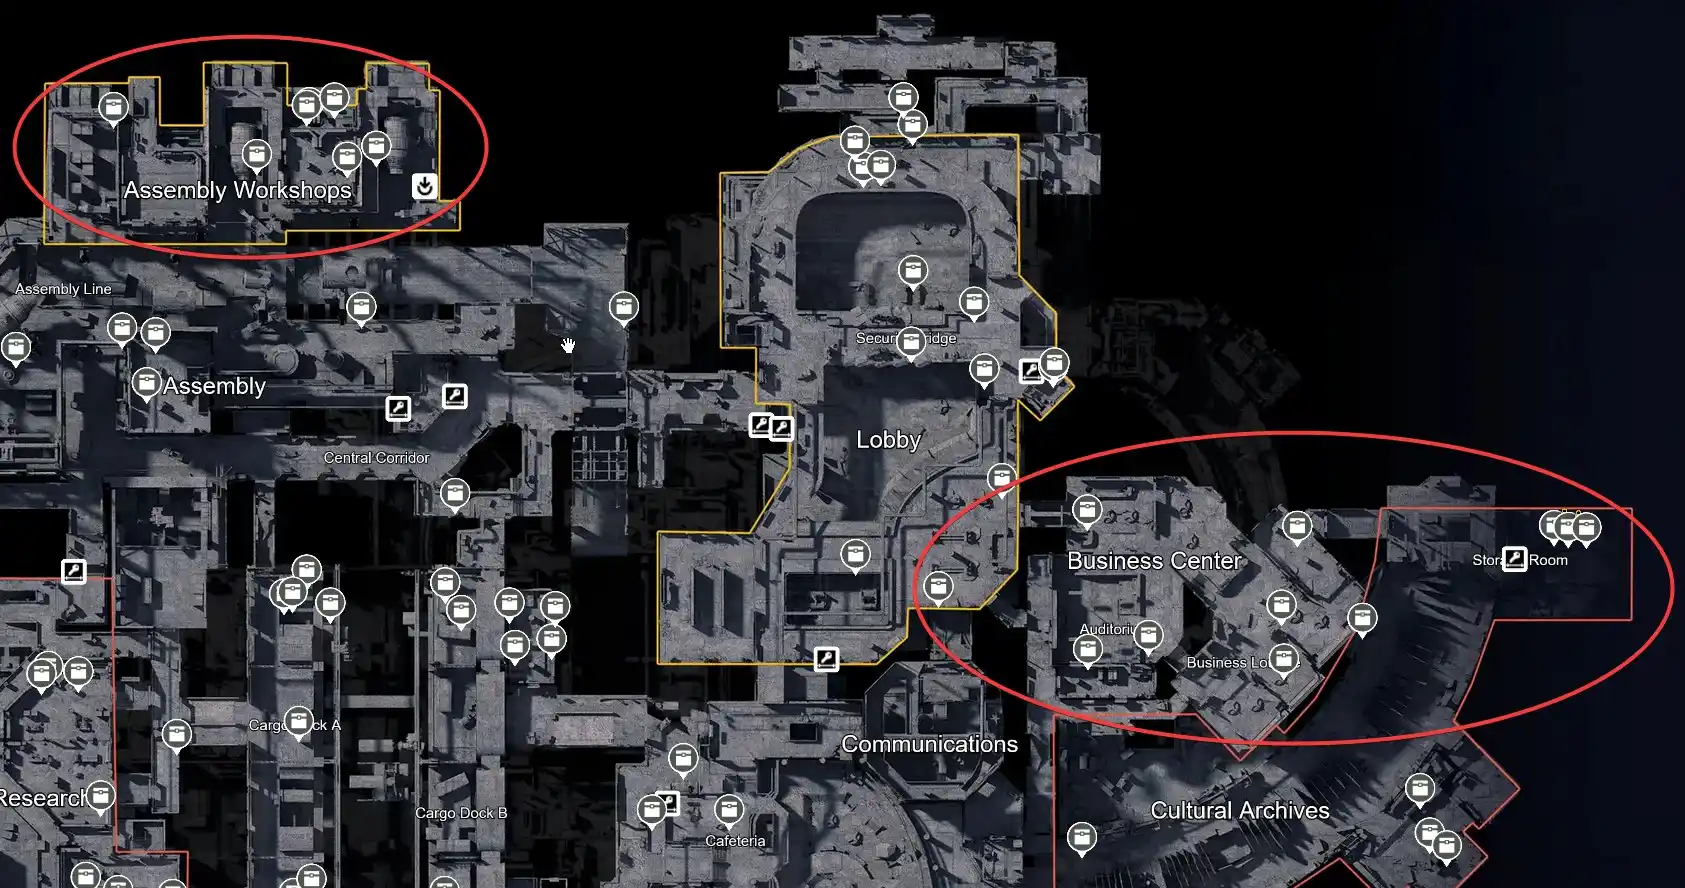
- Assembly Workshops: Great value, relatively safe. Close to Assembly Workshops Hatch for quick extraction.
- Control Room (near Cargo Dock B): Battery farm. Server stacks spawn 10-15 batteries per container.
- Cultural Archives: Warehouse boxes and old-world commercial loot for raw coin value.
Essential Loadout for Value Farming
Keep Shield Recharger and Raider Hatch Key in your Safe Pocket. These protect your escape when runs go sideways.
Crafting recipes to maintain:
- Shield Recharger: 5x Rubber Parts + 1x ARC Powercell
- Raider Hatch Key: 3x Sensors + 1x Advanced Electrical Components
- Looting Mk.2 augment: Essential perk – increases container loot quality
Scrappy passively supplies basic components for Bandages and Shield Rechargers. Use passive income to keep survival kits stocked without dedicated farming.
Grinding 3M stash value manually takes 8-14 hours of focused farming. ARC Raiders Expedition Boost handles all stages plus stash value optimization, delivering maximum skill points at departure. Use code LUBLOG10 for 10% off.
What Changed From Expedition 2
Expedition 3 shuffles several materials while keeping the overall structure identical. Here's what's different:
| Stage | Expedition 2 | Expedition 3 | Verdict |
|---|---|---|---|
| S1 | 200 Plastic Parts | 100 Chemicals | Easier |
| S2 | 35 Cloth, 4 Cooling Coils | 30 Cloth, 3 Industrial Chargers | Easier |
| S3 | 4 Light Bulbs, 30 Batteries, 10 Shredder Gyros | 1 Coffee Pot, 25 Batteries, 5 Firefly Burners | Much easier |
| S4 | 5 FMB, 3 Ion Sputters, 3 Leaper Pulse Units | 1 Broken Guidance System, 3 Snow Globes, 2 Bombardier Cells | Mixed |
| S5 | 750k total donations | 750k total donations | Same |
Overall, Expedition 3 is noticeably easier than Expedition 2. Stage 3 is the biggest improvement – 5 Firefly Burners from all-map spawns versus 10 Shredder Gyros locked to Stella Montis. Stage 4 trades Stella Montis-exclusive farming (Ion Sputters, Freq. Mod. Boxes) for broader requirements that can be farmed on multiple maps. Breathtaking Snow Globes are the only real pain point, and even those appear on every map.
Is Expedition 3 Worth It?
For players who've completed Expeditions 1 and 2, absolutely. Your third departure stacks temporary buffs to 3x levels and through the catch-up mechanic, veterans who complete all three can reach up to 85 Skill Points. That's a massive advantage on any fresh Raider.
For first-time Expeditioners, the permanent +12 stash slots and up to 5 bonus skill points compound across every future Raider. Temporary buffs accelerate early progression significantly.
For casual players happy with current progress, skipping remains viable. No forced wipes exist – your Raider persists indefinitely without participating. But the longer you wait, the more catch-up Skill Points you'll accumulate as discount options. Embark Studios clearly wants everyone to eventually participate.
The grind becomes worthwhile when you treat it as a 60-day project rather than a weekend rush. Stockpile materials passively, farm value during events, and arrive at the departure window prepared. If you'd rather skip the grind entirely, browse our full ARC Raiders boosting services – from Expedition completion to workshop upgrades, raid carries, and stash farming.
Some visuals sourced from Reddit user u/pRoDeeD's cheat sheets.
| Reader Discount: Use code LUBLOG10 at levelupper.com for 10% off |
FAQ
Expedition Project is ARC Raiders voluntary prestige system running in 60-day cycles. You build a caravan across 5 stages by contributing specific materials, then choose whether to depart during a 7-day window. Departing resets most character progress but grants permanent account rewards and temporary buffs for your next Raider.
Several material requirements changed. Expedition 2 replaced Rubber Parts with Plastic Parts in Stage 1, Cooling Fan with Cooling Coils in Stage 2, added Shredder Gyro (10) in Stage 3, and replaced Magnetic Accelerator and Humidifier with Frequency Modulation Box (5) and Ion Sputters (3) in Stage 4. Load Stage totals dropped from 830k to 750k.
Expedition 3 swaps out several materials again. Stage 1 replaced Plastic Parts with Chemicals (100 instead of 200). Stage 2 swapped Cooling Coils for Industrial Chargers with lower quantities across the board. Stage 3 is the biggest shift – Coffee Pot replaces Light Bulbs, Firefly Burners replace Shredder Gyros, and you need fewer Batteries. Stage 4 brought three entirely new items: Broken Guidance System, Breathtaking Snow Globes, and Bombardier Cells. Load Stage stayed the same at 750k total.
Focused grinding takes 10-20 hours for all 5 stages plus additional time for 3M stash farming. Casual accumulation over the full 60-day period requires less dedicated grinding. Most players spread material collection across regular play sessions. ARC Raiders Expedition Boost from LevelUpper can help finish it within time frame and without grind.
Contributed materials stay contributed and stage progress carries over. You lose access to that cycle's temporary buffs, but your caravan remains built for the next departure window. Want your workshop upgrades back? Our ARC Raiders Workshop Upgrade service delivers fully upgraded crafting stations without farming.
Workshop stations stay unlocked but reset to level 1. You keep access to Gunsmith, Gear Bench, Medical Lab, etc., but must re-upgrade each bench on your new Raider.
ARC Raiders has no forced wipes as of now. Players who never participate keep all progress indefinitely. Expedition system rewards those who opt in without punishing those who don't.
At departure, your combined stash value (items plus coins) determines bonus skill points for your next Raider. Every 600,000 value grants 1 skill point, maximum 5 (3,000,000 total). This was reduced from 1M per point in Update 1.17.0, making it significantly more achievable for most players.
Shredder Gyros only drop from Shredders, which spawn exclusively on Stella Montis. Find them in northern and eastern map areas: Lobby entrance, Business Center, Sandbox corridor, Assembly Workshop, Cargo Docks, Lobby Metro platform, and Cultural Archives. You need 10 Gyros for Stage 3, meaning at least 10 Shredder kills. Note: this is an Expedition 2 requirement. Expedition 3 replaced Shredder Gyros with Firefly Burners.
Firefly Burners are exclusive drops from Firefly ARCs – kill and loot a Firefly to get one Burner (guaranteed drop). Fireflies spawn on all maps but are most common on Spaceport and Blue Gate, patrolling open areas near POI outskirts. Target their rear rotors or the yellow fuel line for fast kills. You need 5 Burners for Expedition 3 Stage 3.
Frequency Modulation Boxes spawn in Exodus POIs on Stella Montis, primarily in Medical Research and Assembly Workshop containers. Check every locker and container in these high-tier zones. For low-risk farming, try naked runs – loot the box, Safe Pocket it, surrender. No gear loss, guaranteed progress. Note: this is an Expedition 2 requirement. Expedition 3 replaced them with Broken Guidance System.
Bombardier Cells drop from killing and looting Bombardier ARCs. Best locations are Buried City (Marano Park, Plaza Rosa, parking garage) and Blue Gate (between Library and Town Hall). Use a Photoelectric Cloak and Deadline Mine for one-shot kills, or Lure Grenade plus Trailblazer Grenades focused on the rear cylinder. You need 2 Cells for Expedition 3 Stage 4.
Snow Globes are Epic-rarity trinkets found in Residential, Commercial, and Old World buildings on any map. Buried City is the best farming spot – Grandioso Apartments, Santa Maria Houses, Red Tower all have high container density. Run during Night Raid or Electromagnetic Storm for better rare item spawns. Naked runs with Safe Pocket work well here since you only need to extract one per run.
Buried City produces both Provisions and Materials efficiently. Trinkets found throughout the map count toward Provisions (150k), while crafting materials count toward the Materials category (300k). For Combat Items (200k), craft cheap weapons like Rattlers or donate hoarded weapon mods.